How to Edit Visibility Group Settings in Your Dealer Management System (Step-By-Step Tutorial)
As an experienced sales professional, you understand the importance of respecting the privacy of sales data even within your own dealership. For this reason, most sales teams employ a tiered approach to granting access to select data—especially for teams with multiple sales professionals working at a similar level.
Not only is it unnecessary that they can access their colleagues' sales details, but it may even be problematic to the working environment. For this reason, we've crafted a way for your company to customize who in your company sees what kind of data within your dealer management system in the form of visibility settings.
Quick Contents of This Guide
Click any of these links for quick access to the section you need:
How to Access Your Visualization Settings
Firstly, navigate to https://www.dealershipdrive.com/
Then, make sure you're logged into your account.
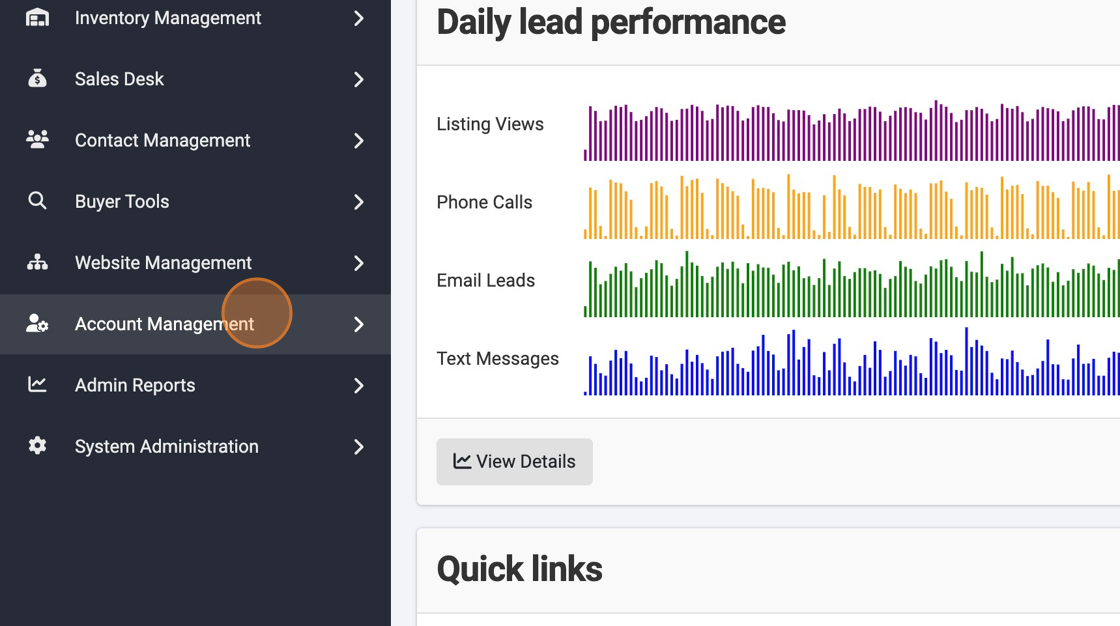
Select "Account Management"
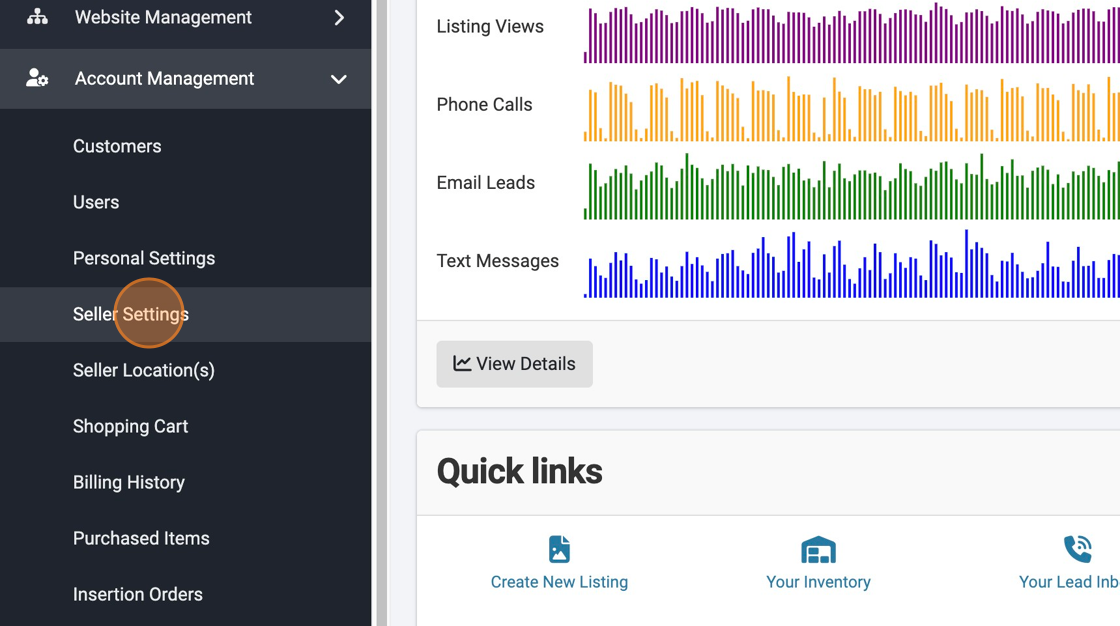
Select "Seller Settings"
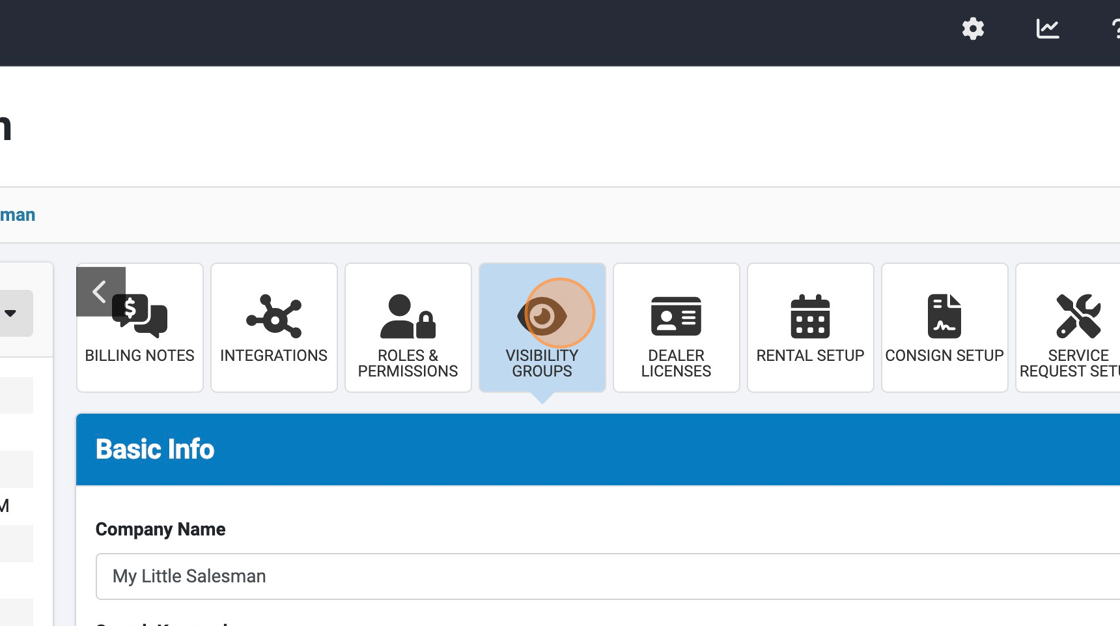
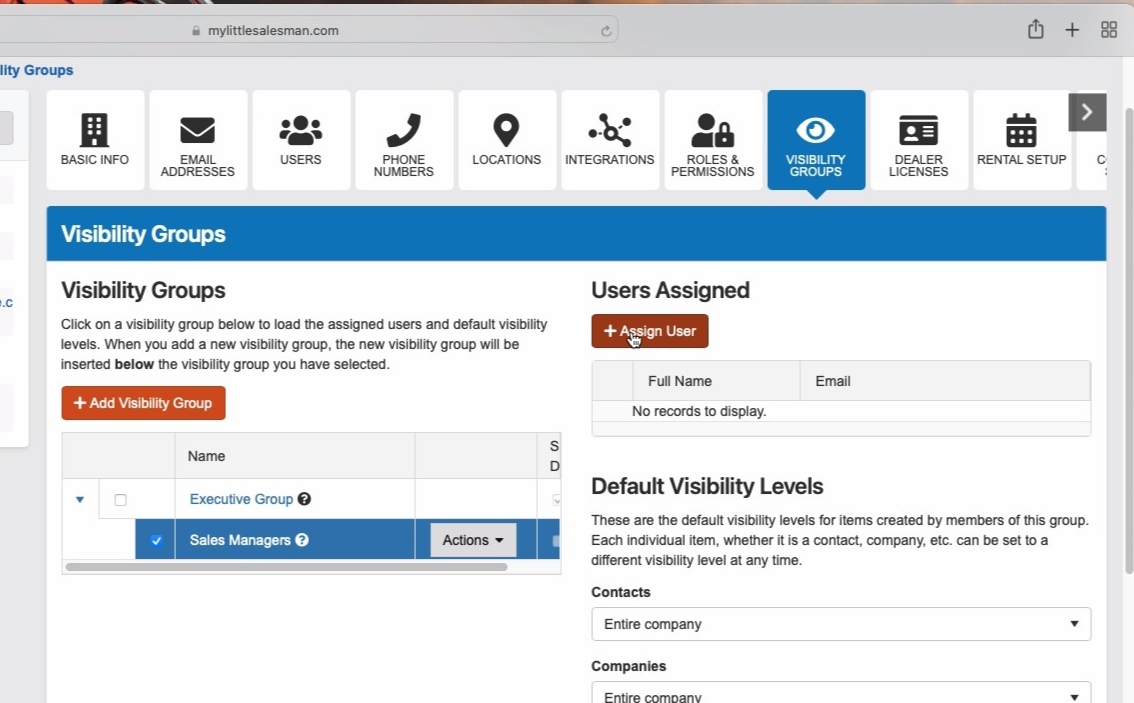
Select "VISIBILITY GROUPS" from the options. You may need to use the side scrolling options to access this button.
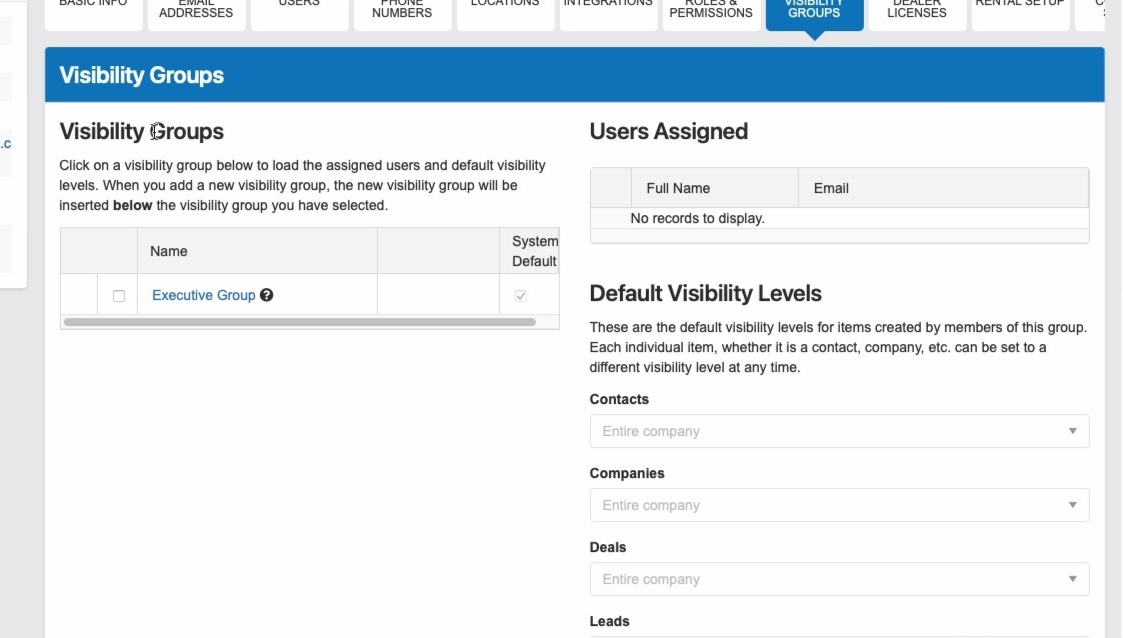
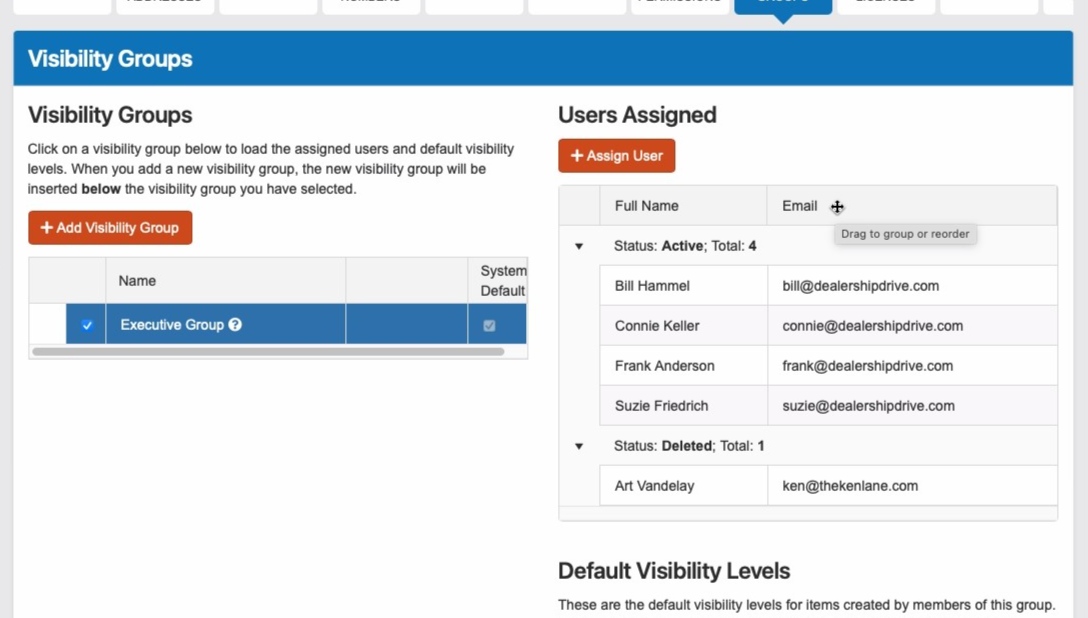
Visibility Groups are established groups of system users within your company with various levels of access to system data.
Executive Group = Access to Everything
All new accounts will feature a default "Executive Group"—a group with unlimited visibility to all system data. This includes system data regarding all Contacts, Companies, Deals, Leads, and Inventory. It is recommended that only the highest-ranking roles, as well as system administrator roles, be granted Executive Group status.
Even as new sub-groups are created, the top-level Executive Group users will continue to be able to view all system data.
For gradually restricted visibility, various visibility groups should be created with visibility permissions customized to reflect the appropriate access for each group, but we'll touch on that in just a few more steps.
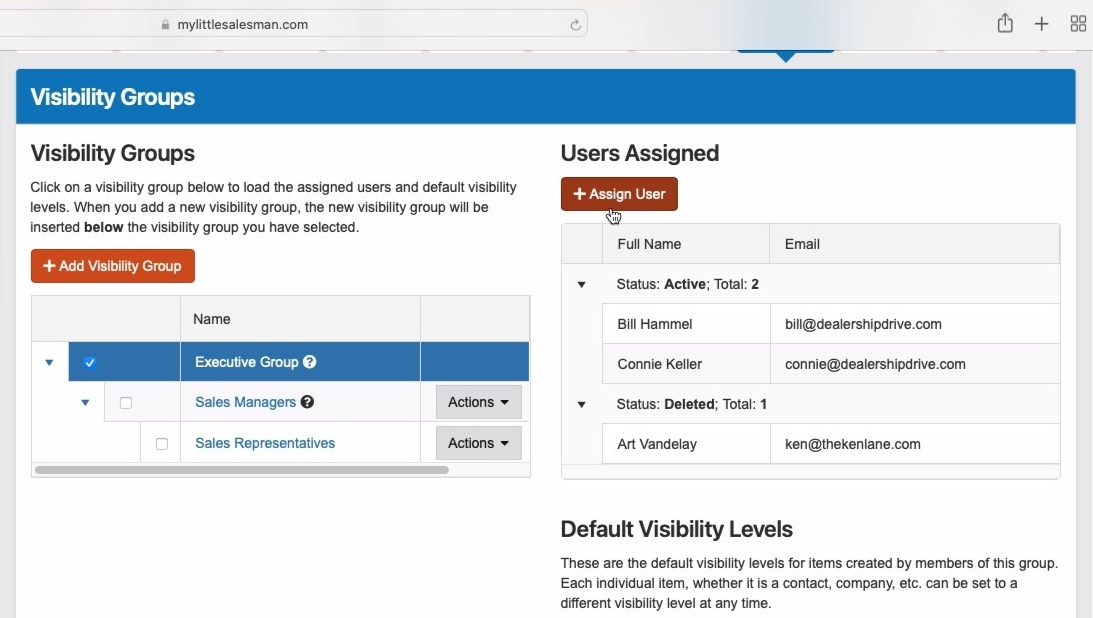
To avoid confusion, users of your company's system may only belong to one visibility group at a time. They can be added or moved to their appropriate group by members of the next higher-ranking group. The user members of a particular visibility group will be listed in the "Users Assigned" section for the group selected (with its check box selected).
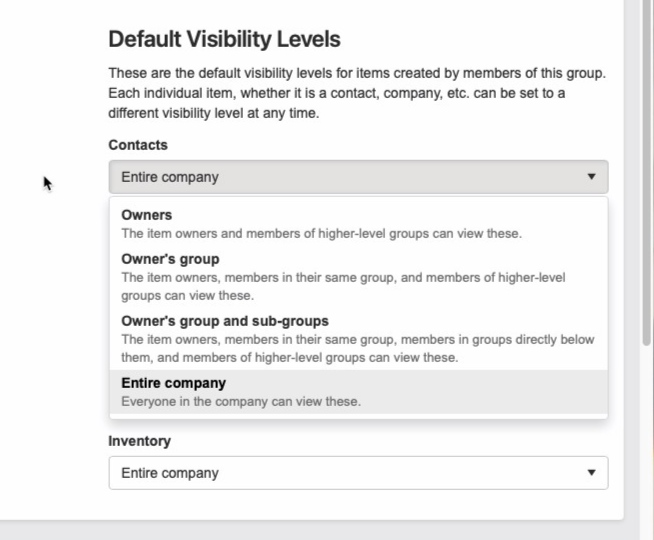
The visibility levels for additional groups will be listed and customizable in the "Default Visibility Levels" section of the panel.
All visibility groups work on a tiered system—with all visibility levels accessible to their parent group (the group above it).
How to Add a New Visibility Group
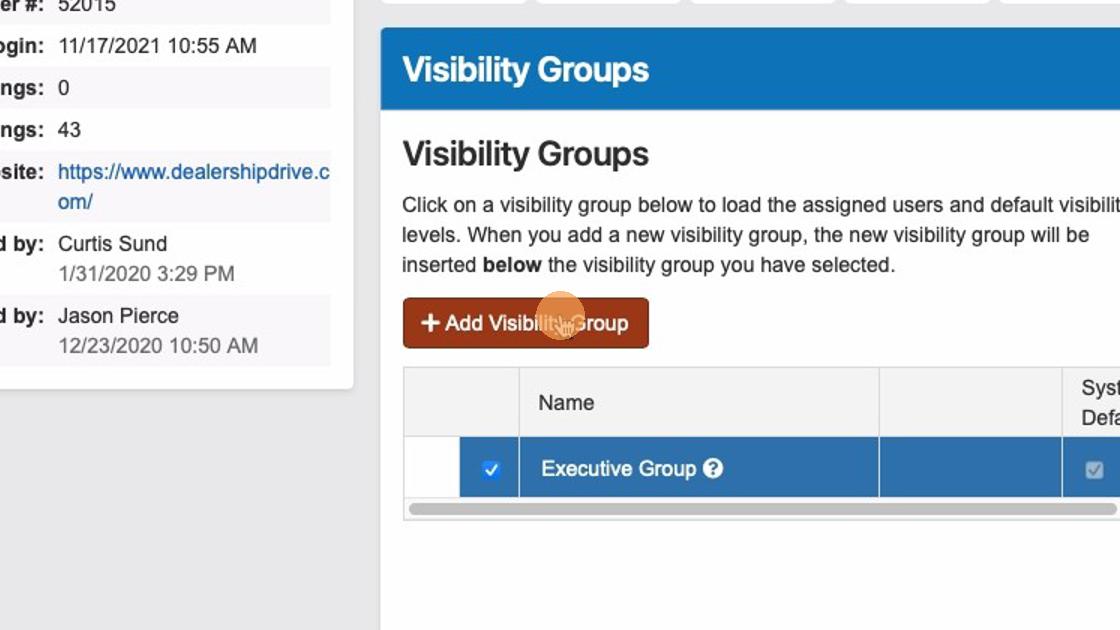
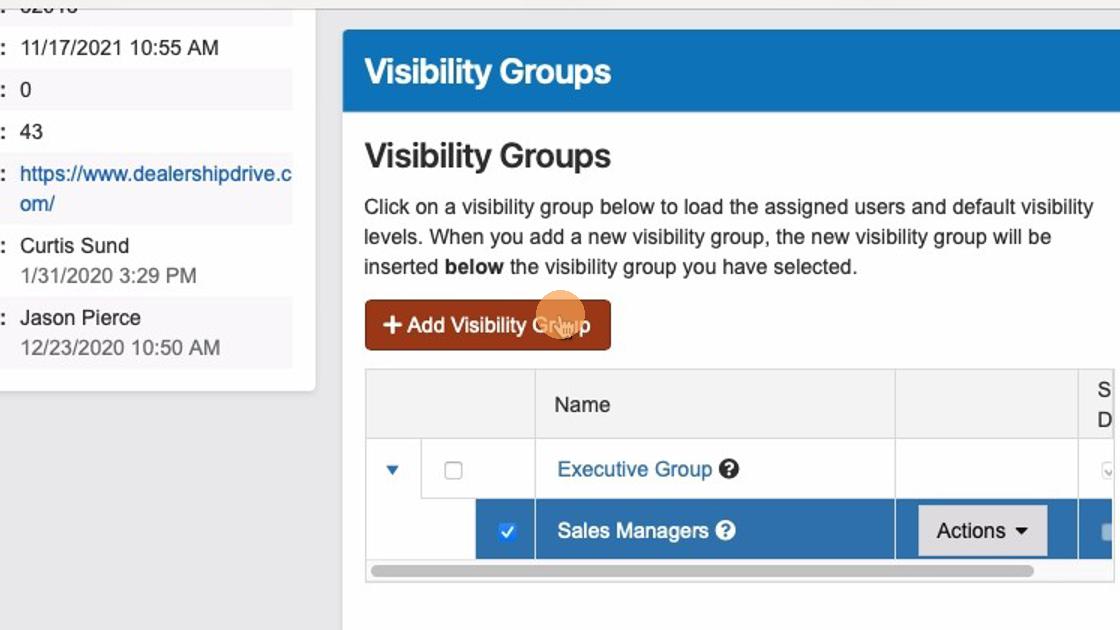
To add a new tiered visibility group, select the checkbox of the parent group to which you wish to create a corresponding child group. With the higher-tiered parent visibility group selected, select the "+ Add Visibility Group" button.
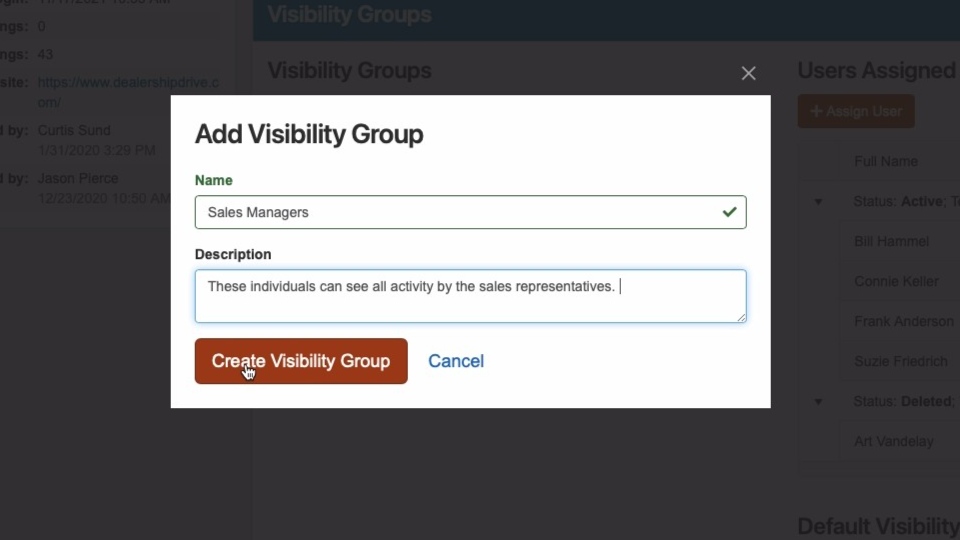
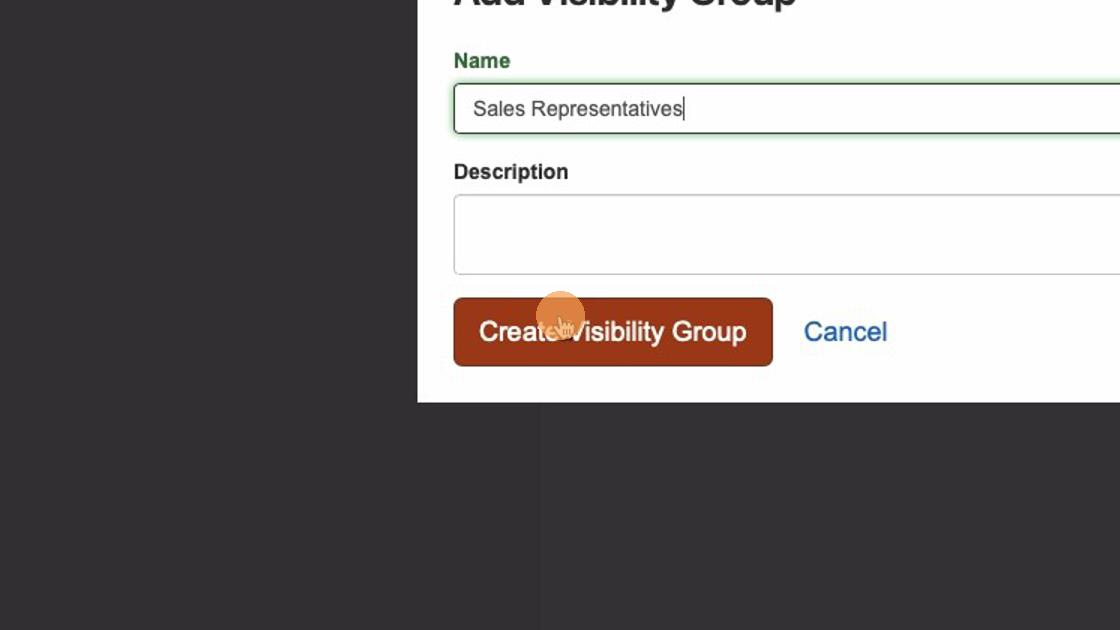
In the panel that appears, name the new visibility group and enter a brief description of the role. Select the "Create Visibility Group" to create the group.
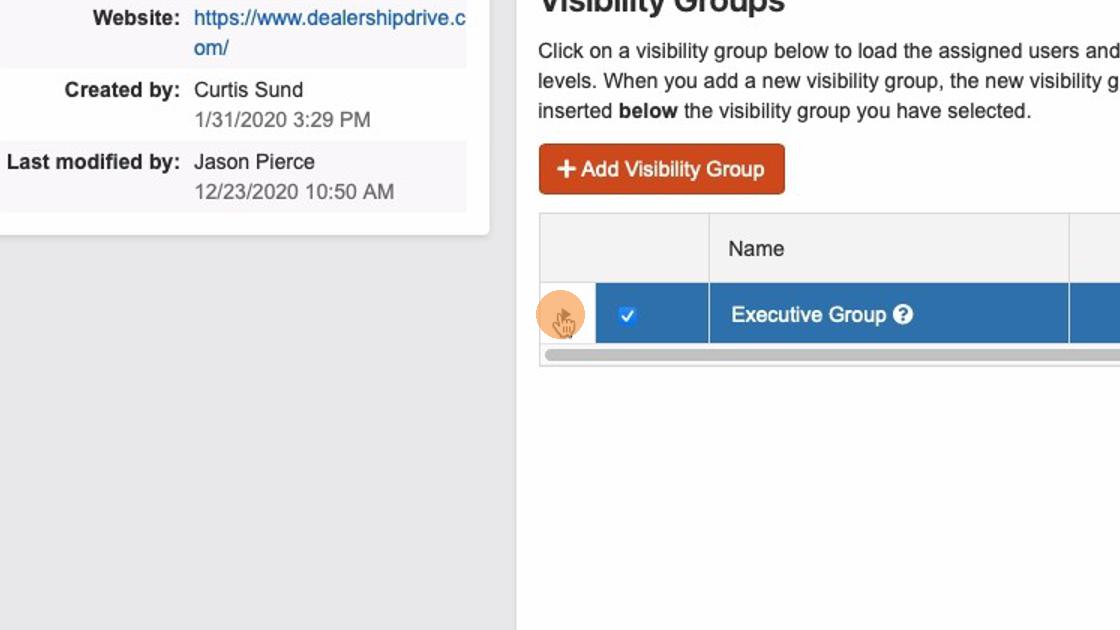
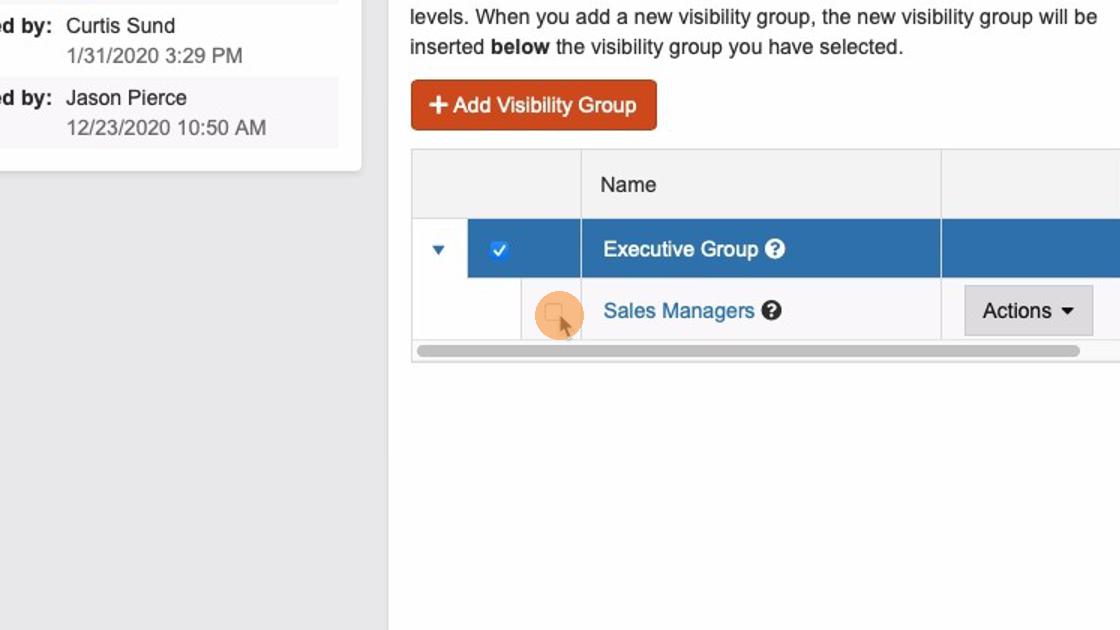
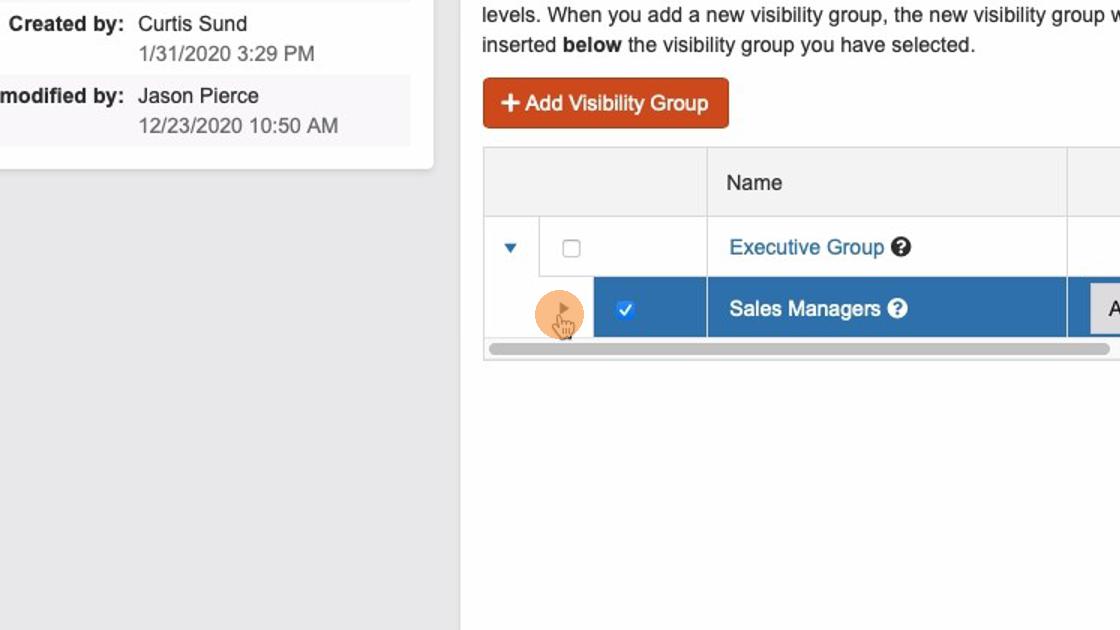
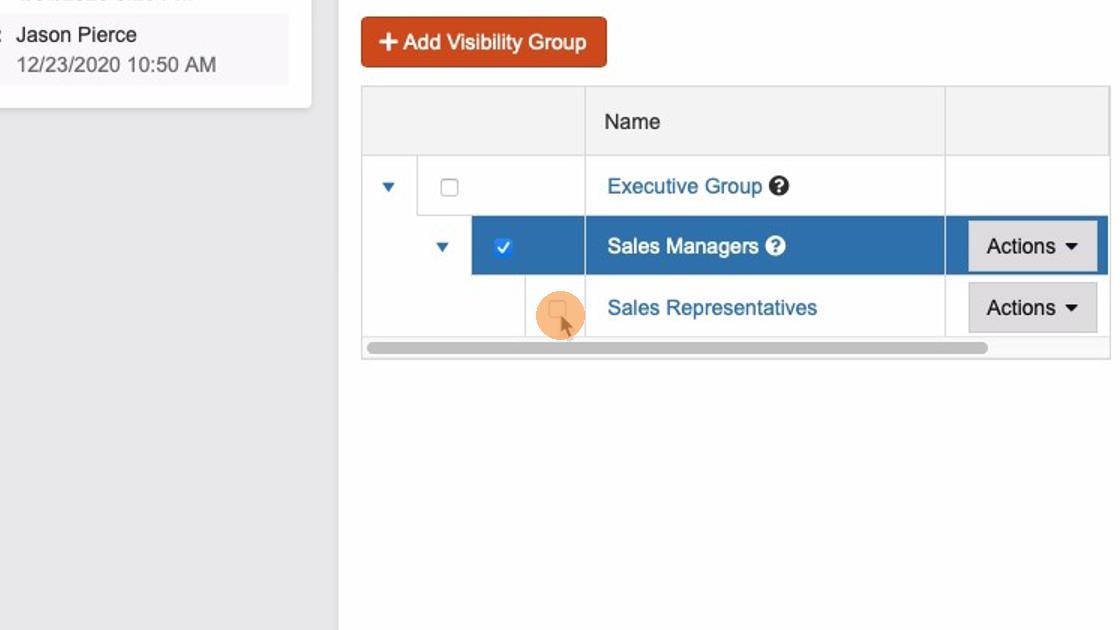
After creating/adding a new visibility group, make it visible in its tier by selecting the arrow directly to the left of its parent group
To begin customizing your new group, select the checkbox that corresponds to the visualization group.
How to Assign Users to Specific Visibility Group
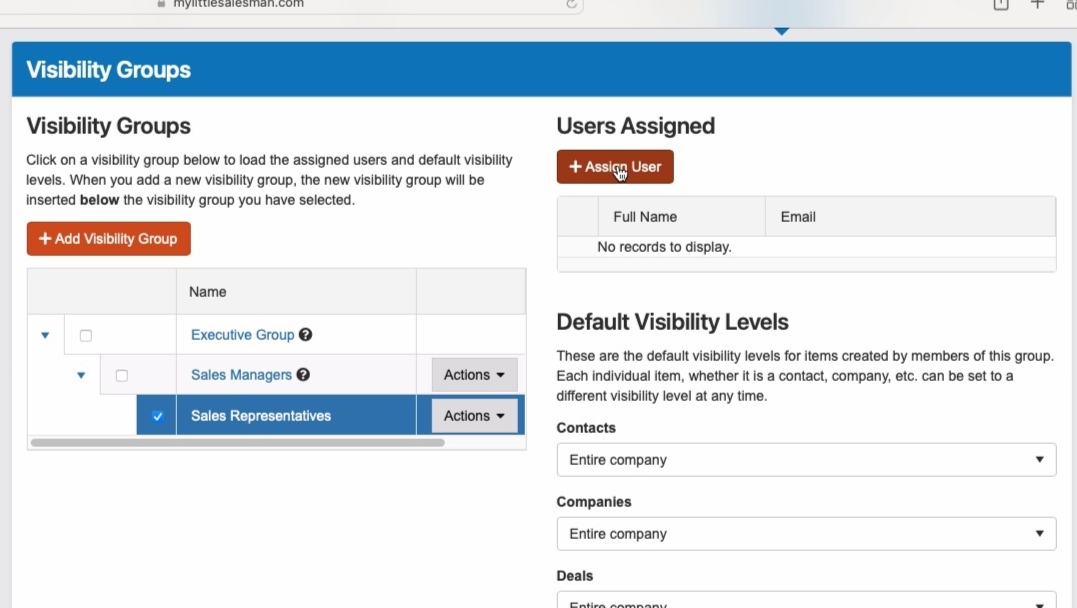
To start adding users from your company system to this group, make sure the appropriate group's checkbox is selected, and then select the "+ Assign User" button in the Users Assigned section.
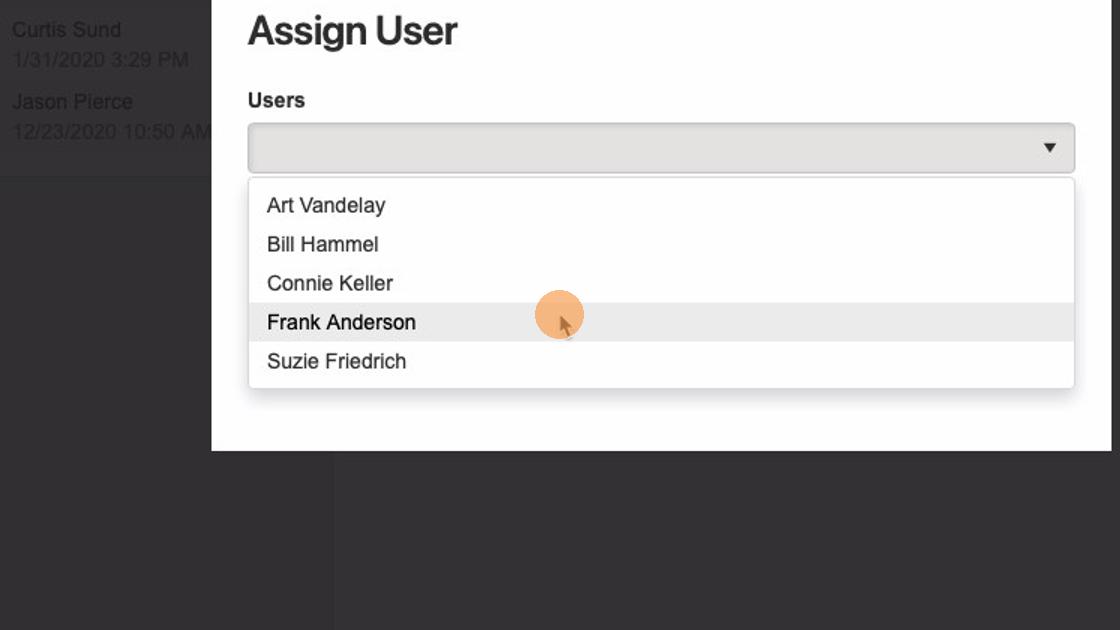
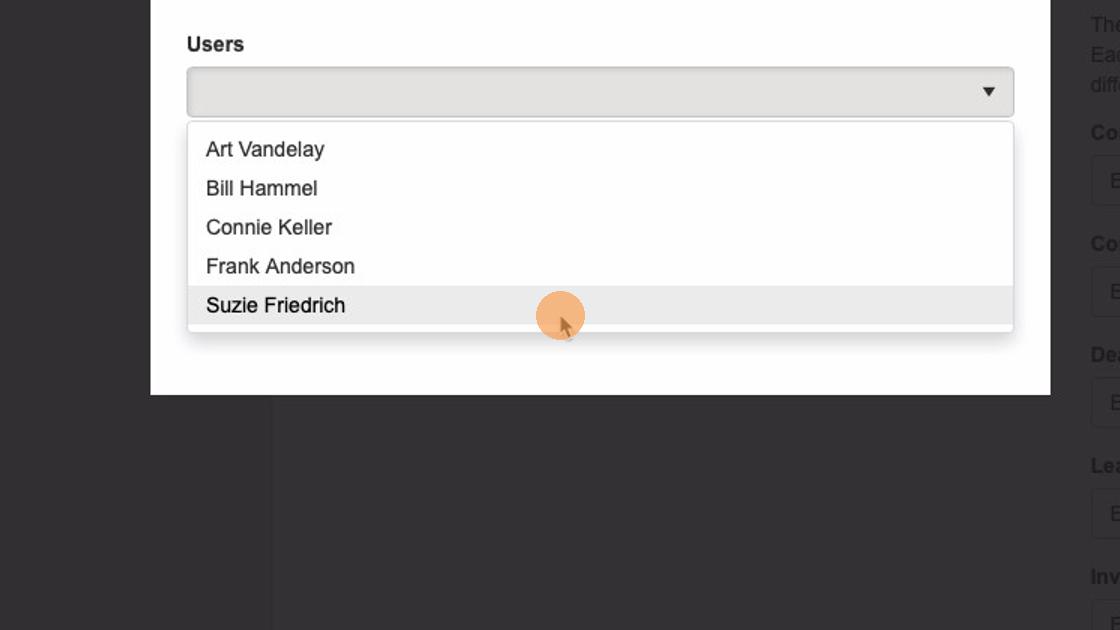
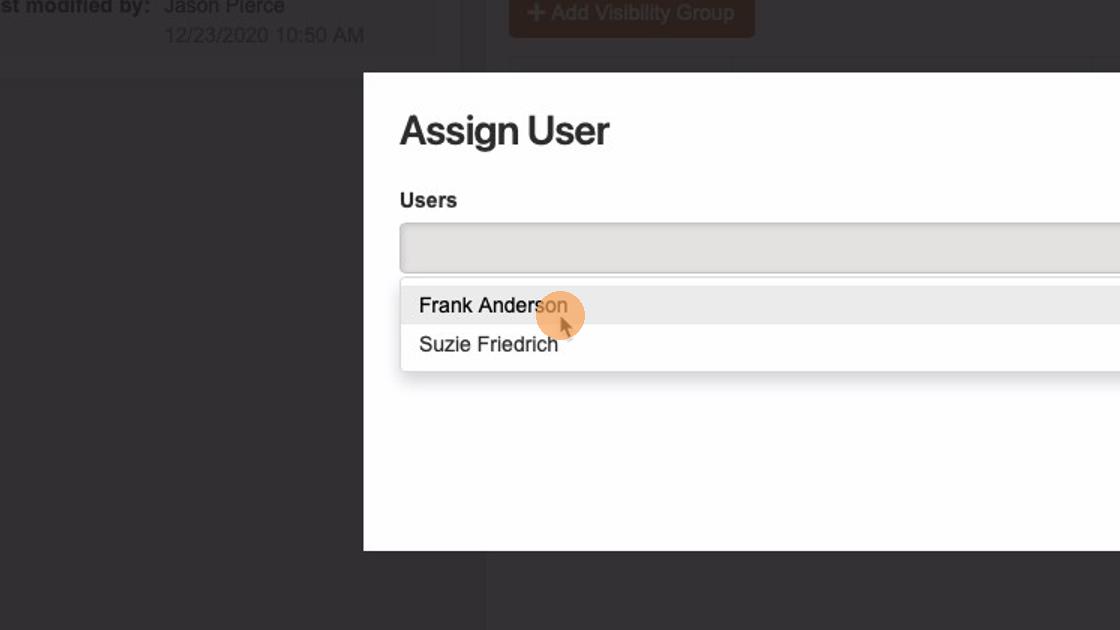
In the panel that appears, use the drop-down to select the company user you wish to add to the visualization group.
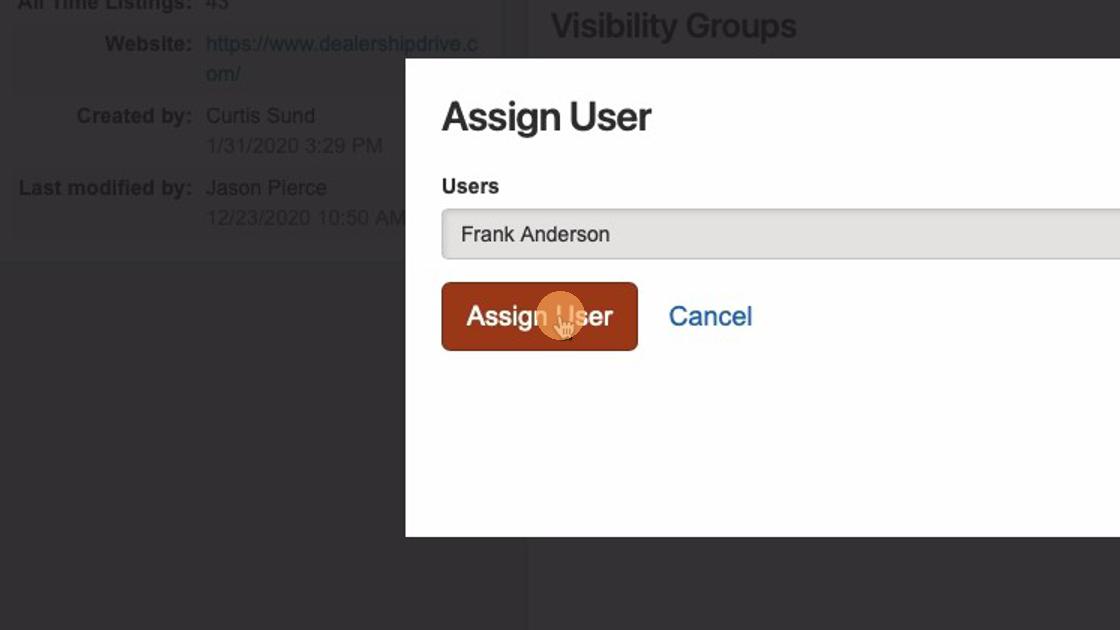
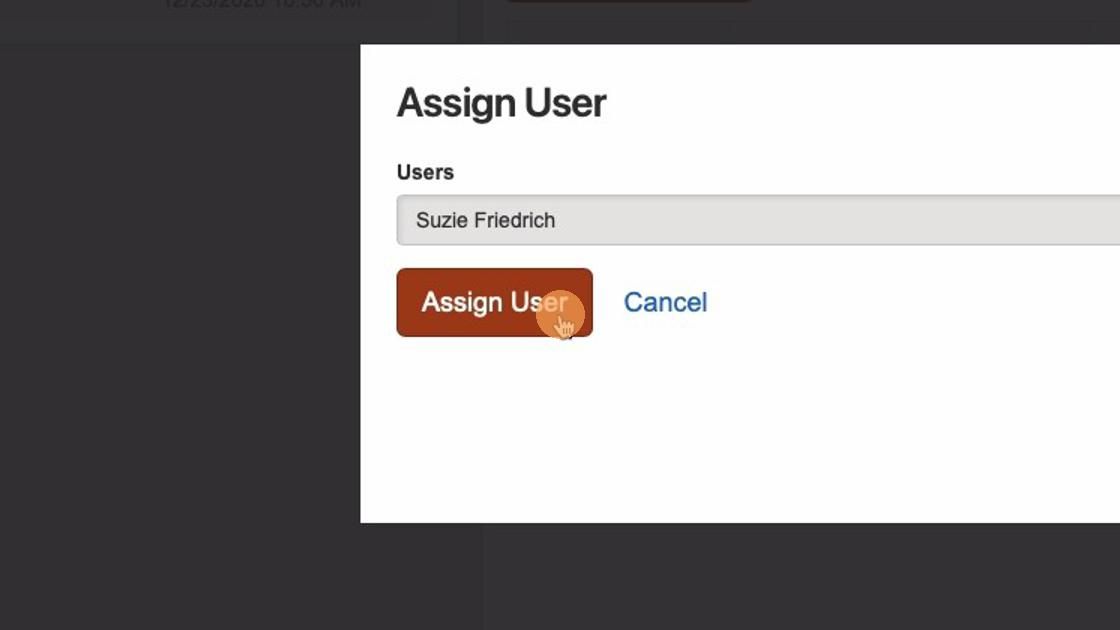
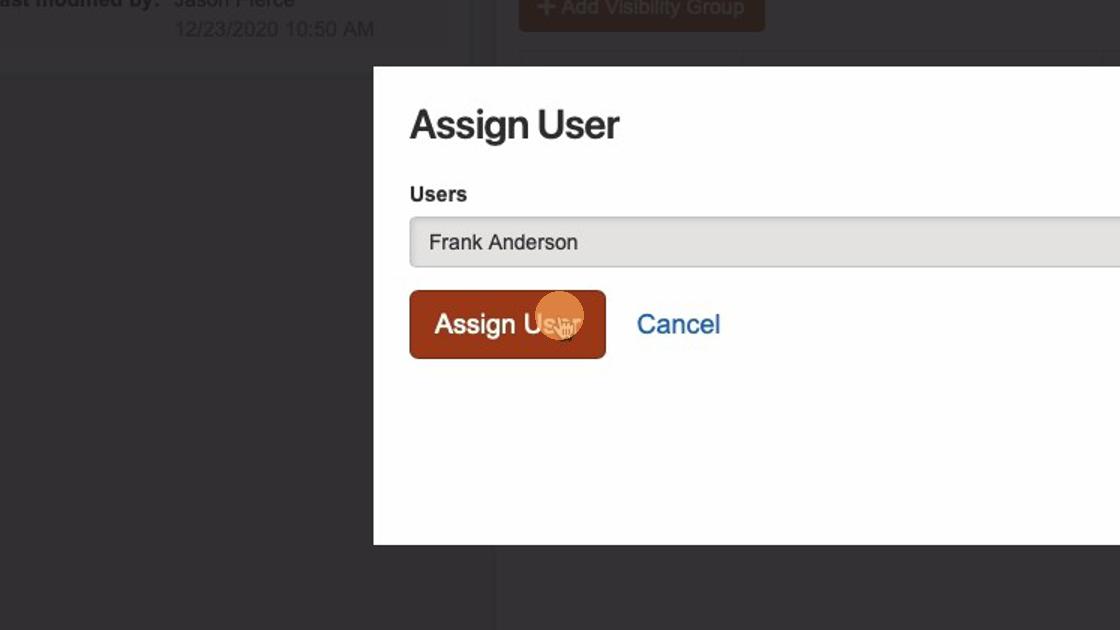
Once you have selected the user you'd like to add, select the "Assign User" button to confirm.
How to Change a Group's Visibility Levels
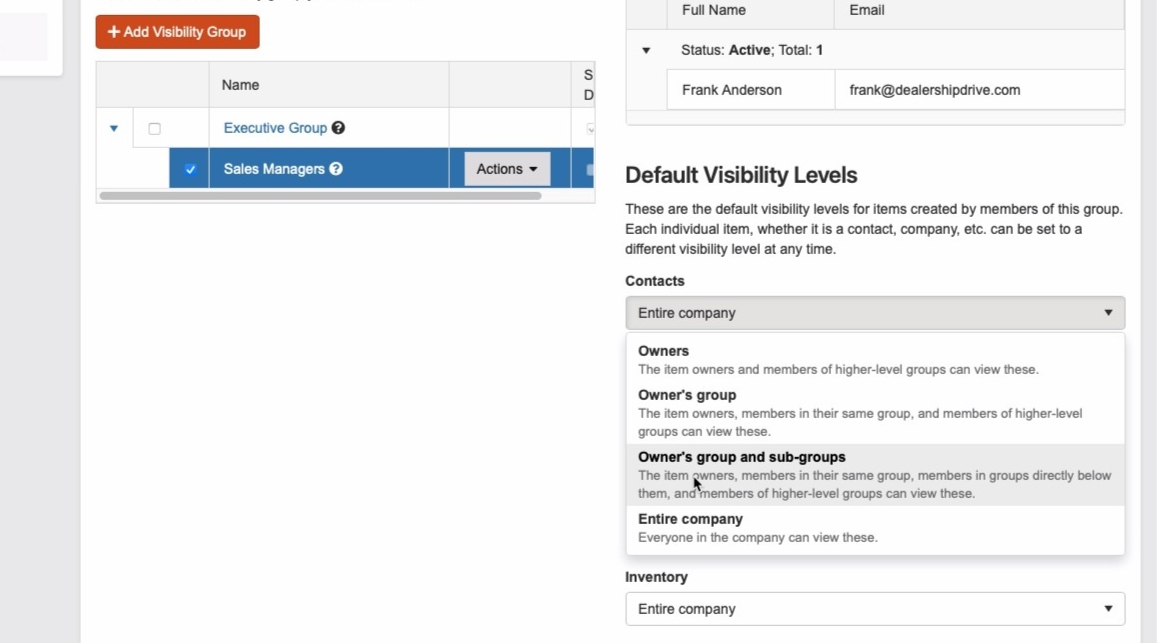
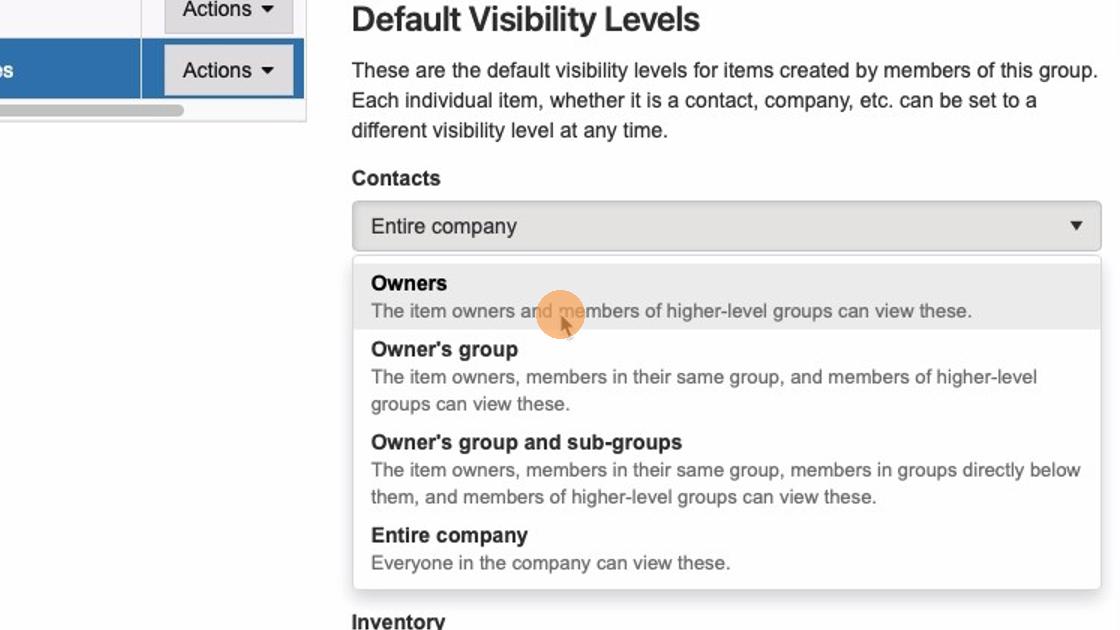
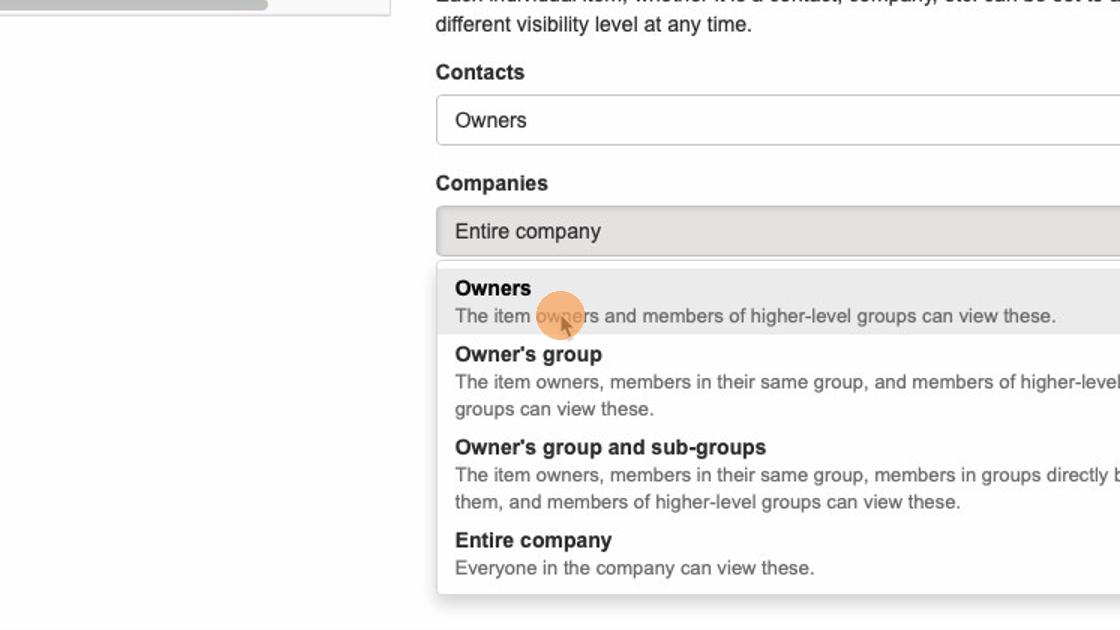
To edit the visualization levels for this new group, make sure that the checkbox for the group is checked and then use the drop-down panels for each data category to customize the visualization levels across the categories of Contacts, Companies, Deals, Leads, and Inventory for your system data.
Example of Setting Up a New Sub-Tier/Child Visibility Group
So, you have Sales Managers who need to see all of the details about the contacts, transactions, and inventory in the process of being sold by their Representatives. Still, it is likely not necessary or a good idea for each Sales Representative to see such data corresponding to their fellow Representatives. To maintain the appropriate levels of access for all involved, it is a good idea to set up a Sales Representatives visibility group that is managed by the Sales Managers' group.
Let's take a look at how we would go about setting this group up.
First, we would select the parent upper tier group—in this case, the Sales Managers group—followed by selecting the "+ Add Visibility Group" button.
We would then name the group appropriately, providing a description if we'd like, and select the "Create Visibility Group" to confirm the creation of the new sub-group.
To reveal the new group you've just created for selection, click the arrow icon associated with its parent group to reveal all child groups.
To add new Sales Representatives to the corresponding group we just created, we would first make sure the group is visible by selecting the left-side arrow corresponding to its parent group (Sales Managers), first, select the Sales Representatives group's checkbox or whichever group you wish to edit.
Select the "+ Assign User" button in the Users Assigned section of the panel.
In the panel that appears, we would use the dropdown option to select the user(s) we want to add to this group.
We would then select "Assign User" to confirm the addition of this user to the Sales Representatives group.
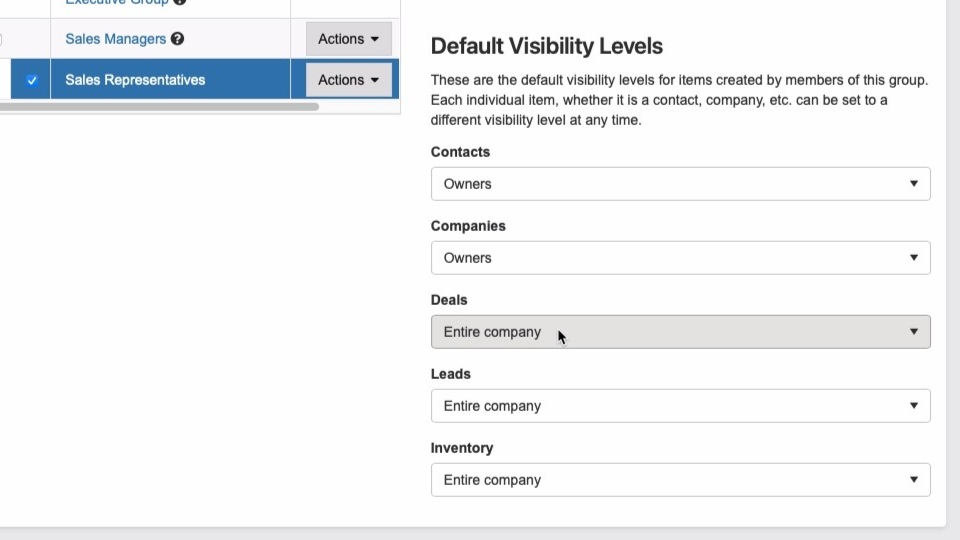
To customize the visibility levels for the Sales Representative group, we would use the various dropdown options in the Default Visibility Levels section. In this instance, you may want to make Sales Representative Contact records only visible in the system to their owners—the salespeople handling their business.
Remember that these customized visibility levels only apply to this particular group. The Sales Managers and Executive Group are still set to have full visibility of these system details.
To further customize the visibility of what this group can access, update each section's visibility criteria as you see fit per visibility group.
Editing the visibility levels for Deals allows you to select what users in the company can view Deal-related activity. The "owner" of a Deal would be the Deal's designated sales representative.
How to Move Users Between Visibility Groups
If you wish to move a user from one group to another—perhaps someone was promoted or placed in the wrong group—simply proceed as though you were adding the user to the new group for the first time.
With the proper Visibility Group selected on the left side, select the "+Assign User" button in the Users Assigned section.
In the panel that appears, use the dropdown to select the user you wish to add to this different group.
Select the "Assign User" button to confirm. Now the user can enjoy all of the visualization settings of their new appointed group.
How to Delete a Visibility Group
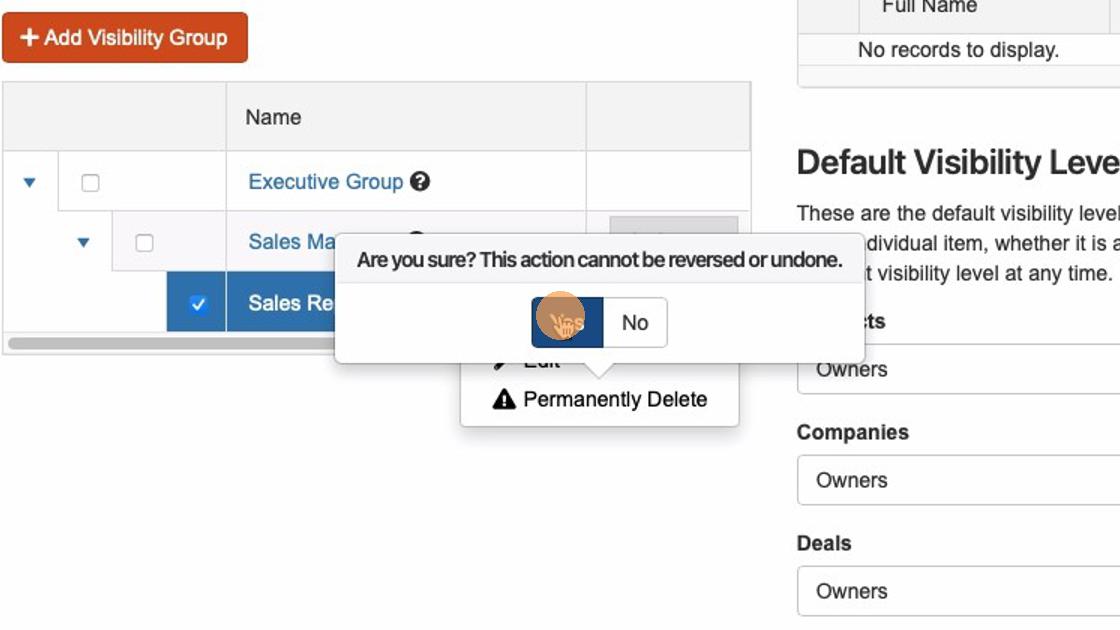
If you would like to delete a group, each selected group will have a "Actions" button associated with it. You can use this to permanently delete the group.
Keep in mind that if you would like to delete a group, you must first move the group's user members to other groups to do so. A group cannot be deleted if it contains users.
How & Where to Utilize Visibility Settings in Your System
The visibility settings of certain users in their selected groups may also be applied and edited to various functions within your dealer management system. Let's look at a few examples, starting with Contact records.
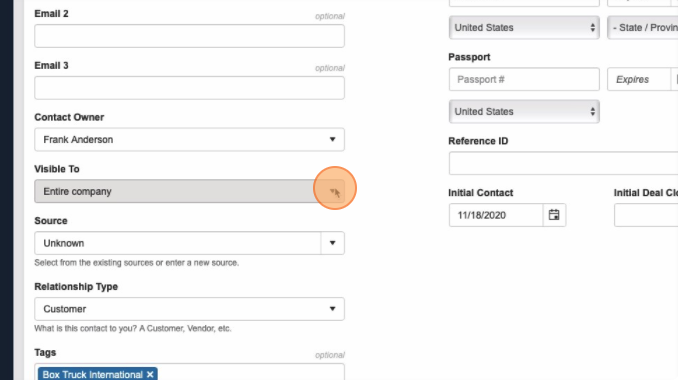
In this Edit screen of a Contact, the owner or other administrator can adjust the visibility of this particular record by selecting the "Visible To" setting.
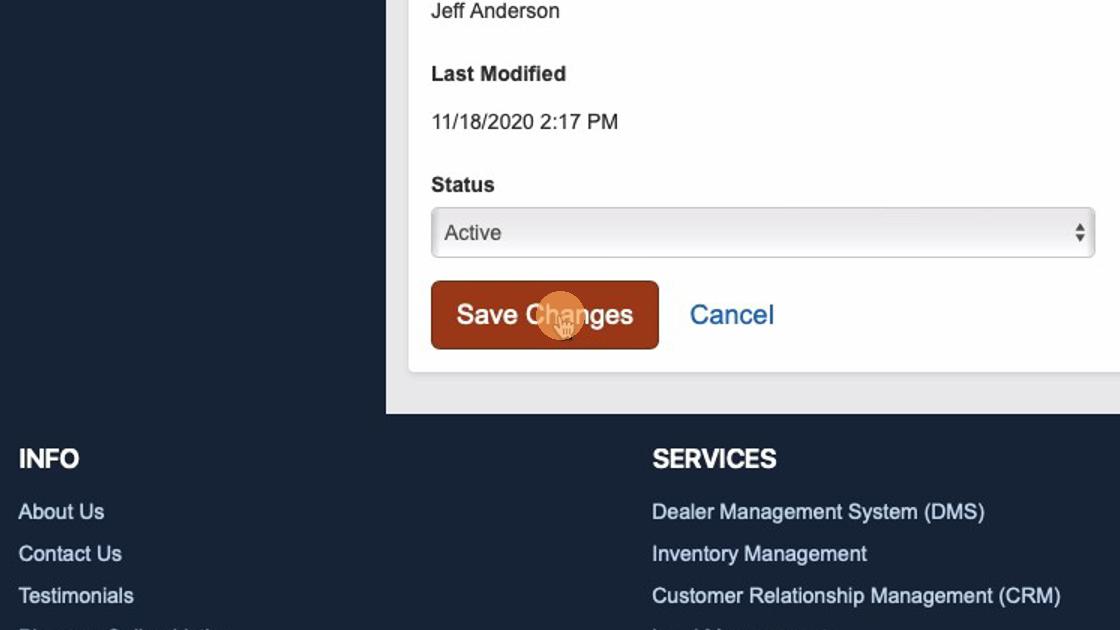
Remember to select "Save Changes" so the new visualization settings are saved.
"Visible To" in Dashboards
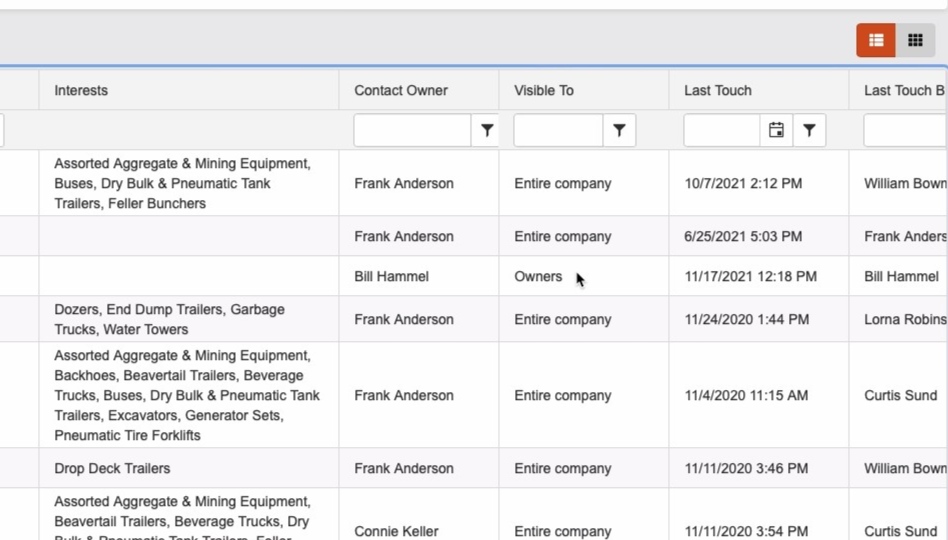
The visibility settings for various records can also be found on various dashboard views throughout the system under the "Visible To" column. You are also able to filter search results based on visibility settings.
Accessing & Adjusting Visibility Settings in Deals
Adjusting Visibility on Deals The visibility settings of certain aspects of Deals may also be accessed and edited by those with the appropriate permissions.
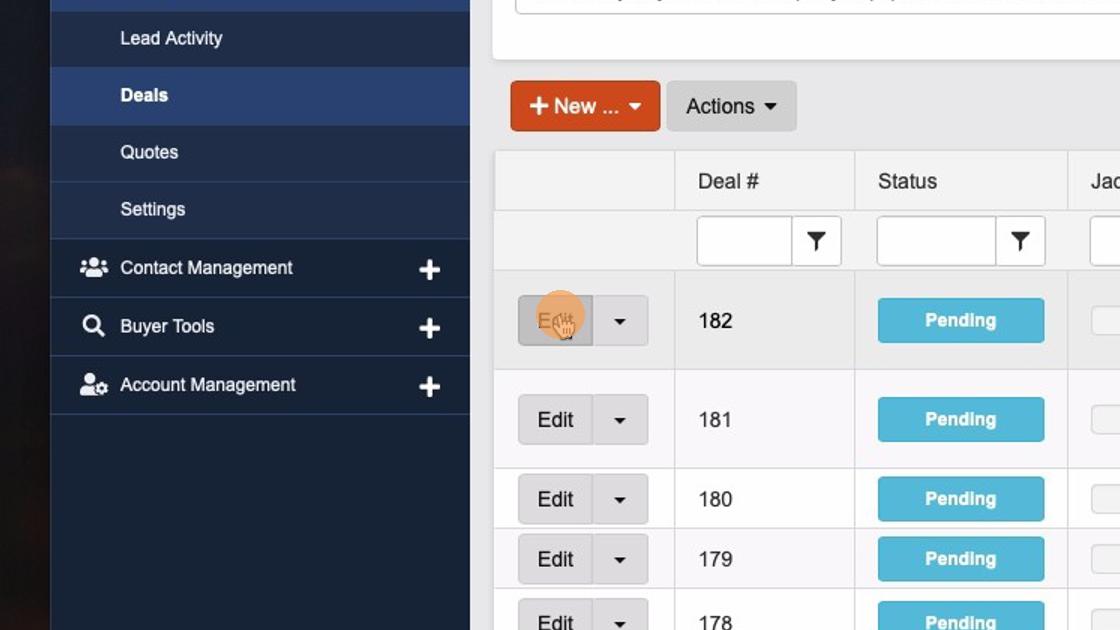
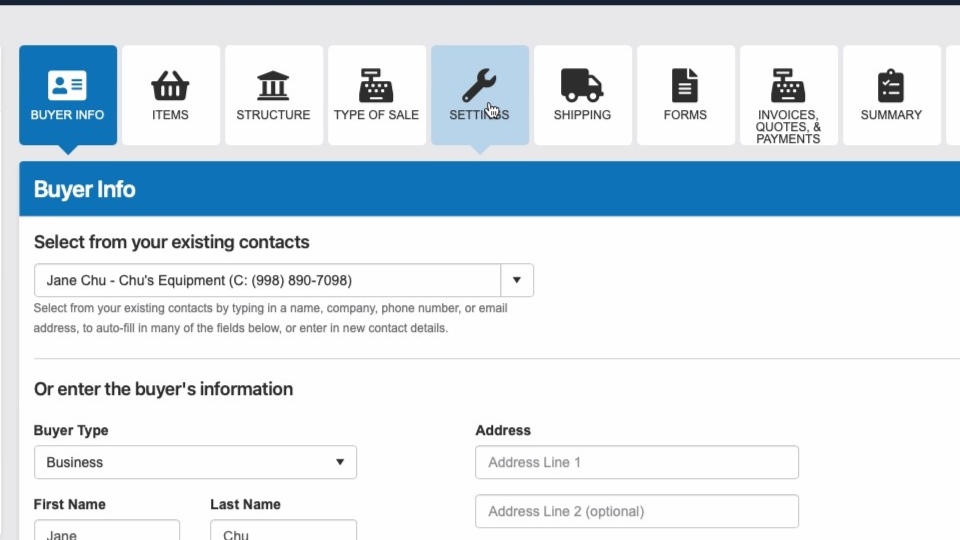
To access these setting adjustments, access your Deals panel and select the "Edit" button corresponding to an associated Deal.
In the Edit panel of a Deal, select the tile-like "Settings" button.
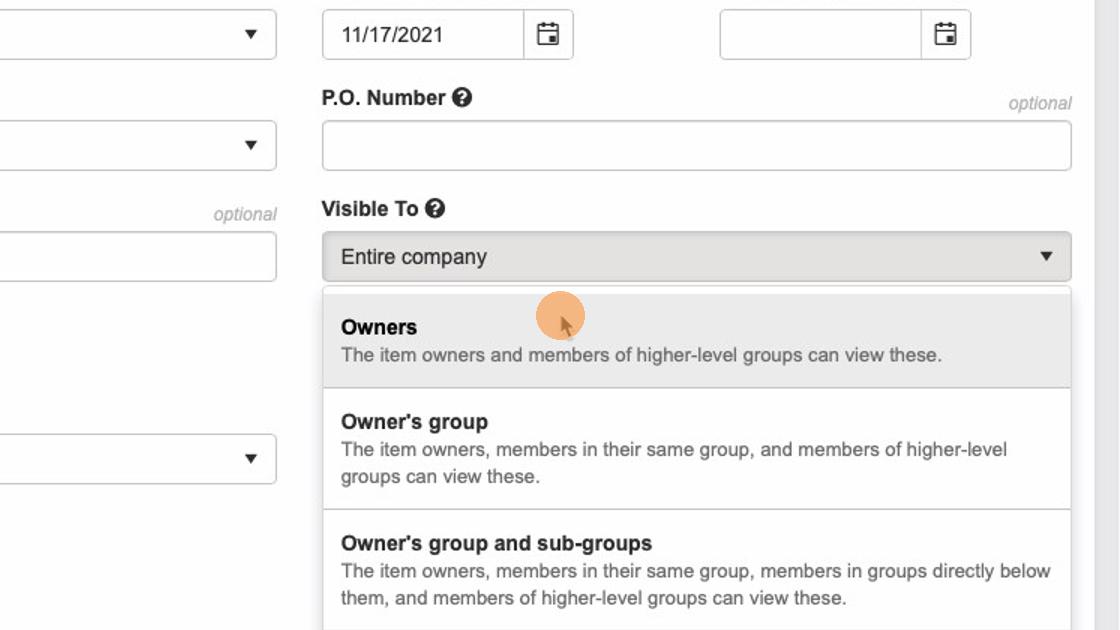
Once in the Settings screen, scroll down and locate the "Visible to" dropdown option to adjust the visibility of this particular Deal.
Once the visualization settings are edited in particular Deal settings, remember to scroll to the bottom and select "Save Changes" to confirm your changes.
Related: For more help understanding your Deals system, we've created a step-by-step Deals tutorial to help you easily master your Deals system.
Questions and Suggestions?
Contact your Dealership Drive sales representative.

