
How to Automatically Post New Listings to Your Facebook Page
With our Zapier integration, you can seamlessly automate the process of posting new listings from your Dealership Drive inventory directly to your Facebook page.
To use this feature, you'll need both a Zapier account and a Facebook account. If you don’t have either, please create your accounts first.
Create a Zap on Zapier
After logging into Zapier, click "Create" to set up a new Zap. The Zap is an automated workflow that connects your Dealership Drive account with your Facebook account.
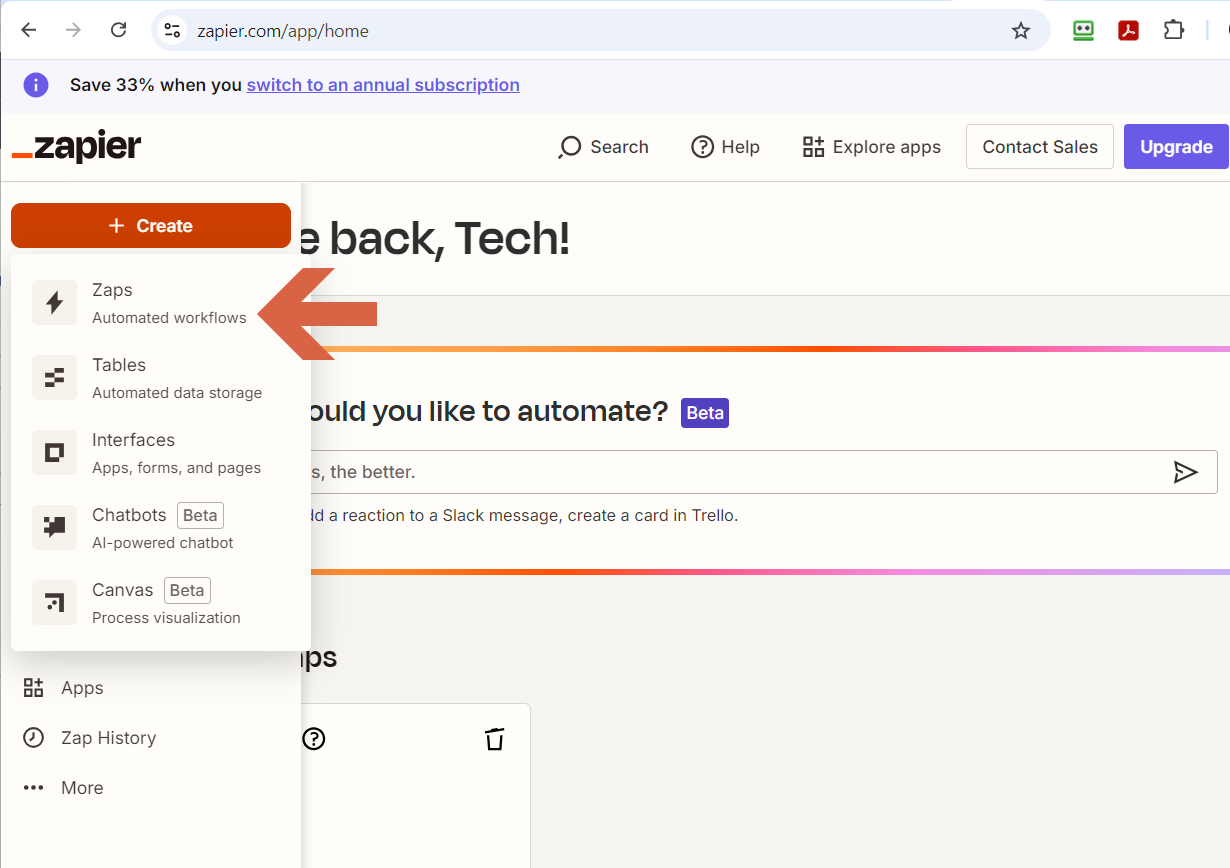
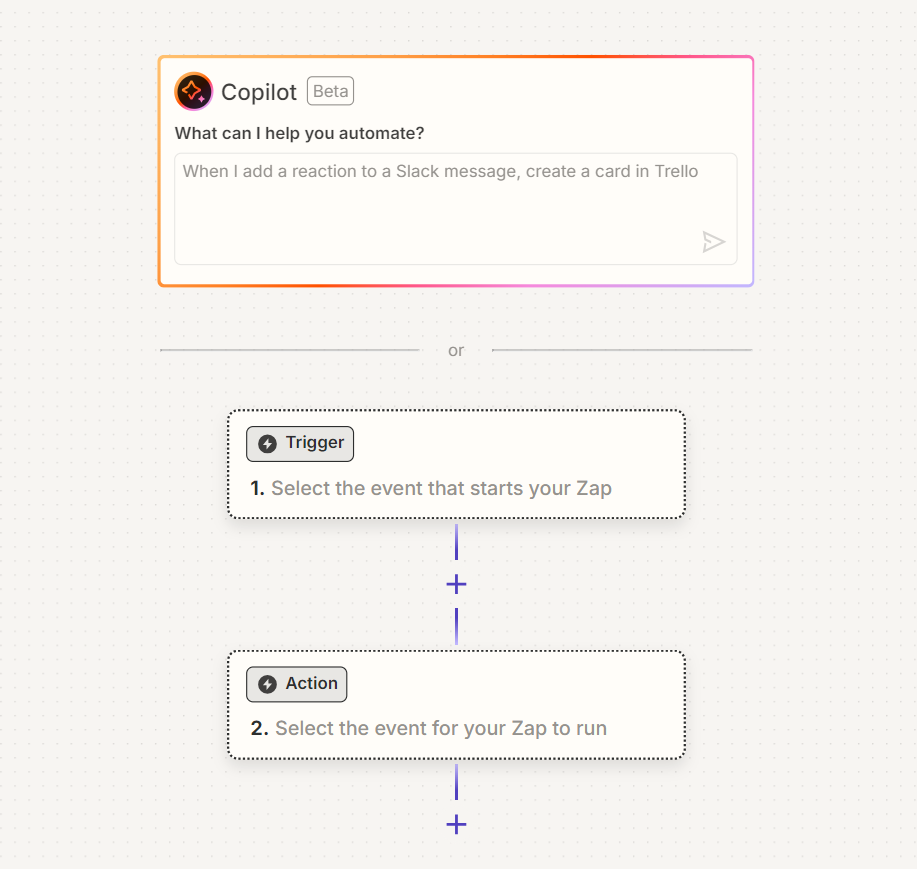
Every Zap consists of a trigger step or an event that occurs in one app, and one or more action steps or events the Zap will perform in the other app when it's triggered. In this case, the Zap would be "When a new listing is added to my Dealership Drive inventory, automatically share it to my Facebook page".
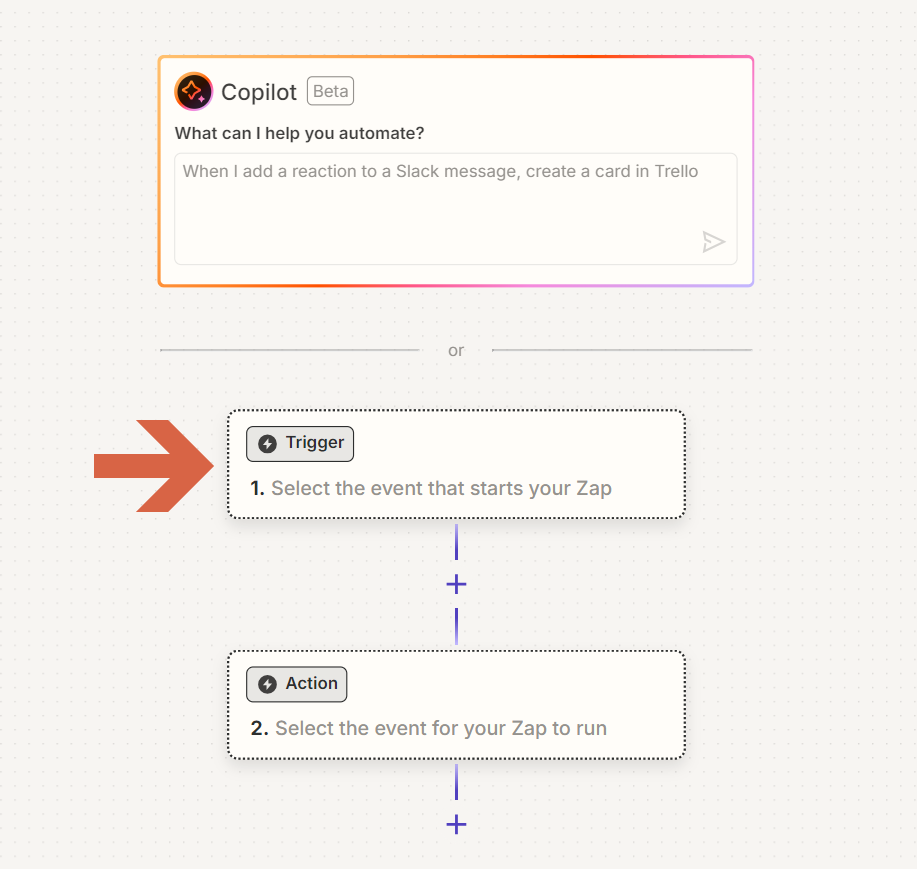
Add a Trigger
In order to add the trigger "When a new listing is added to my Dealership Drive inventory", click on the "Trigger" tab.
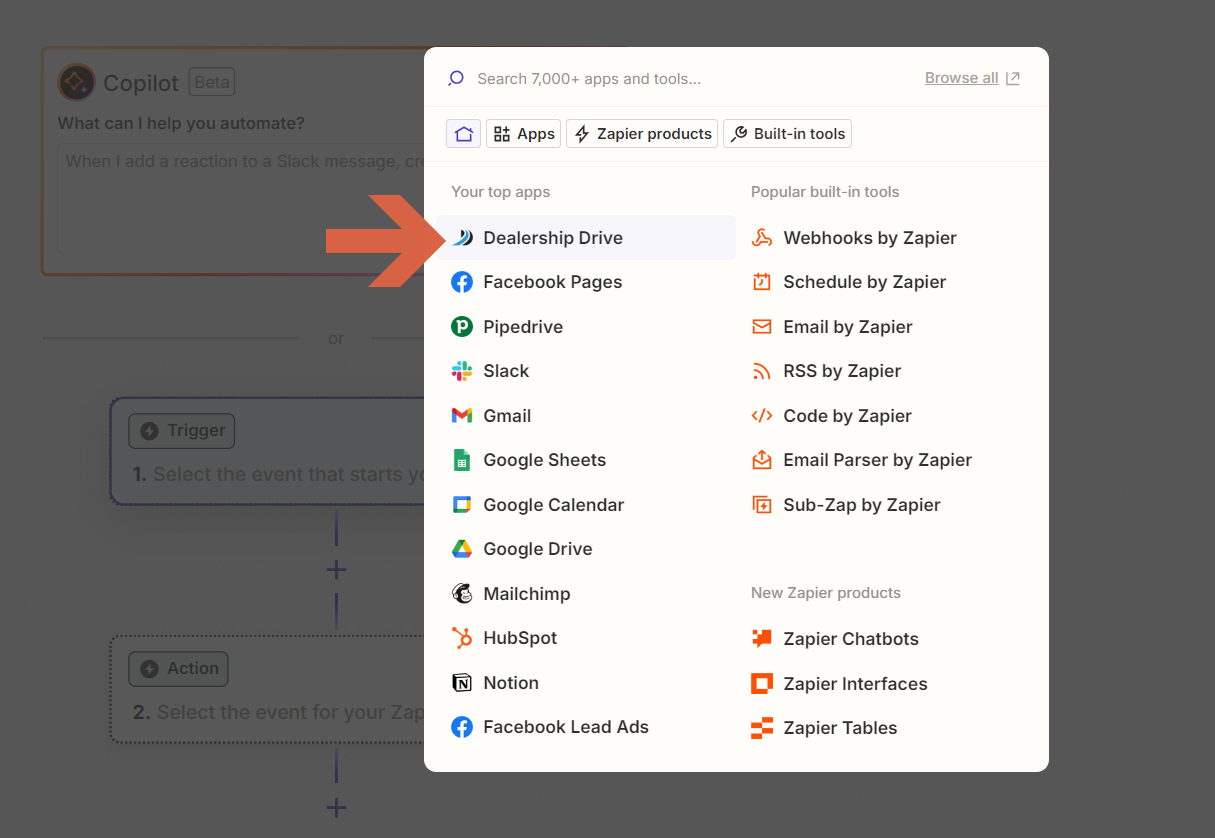
1. Select Trigger app
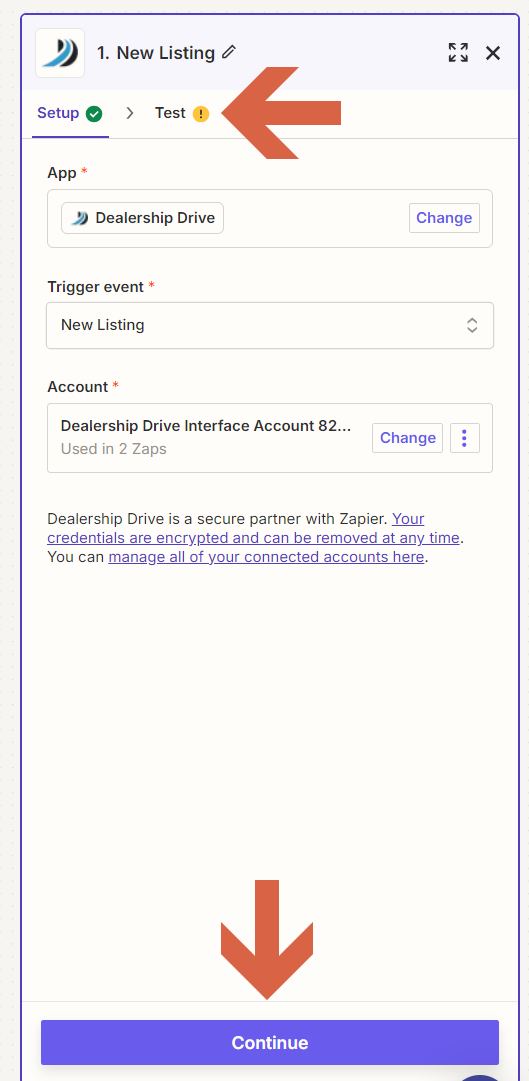
Select Dealership Drive as your trigger app.
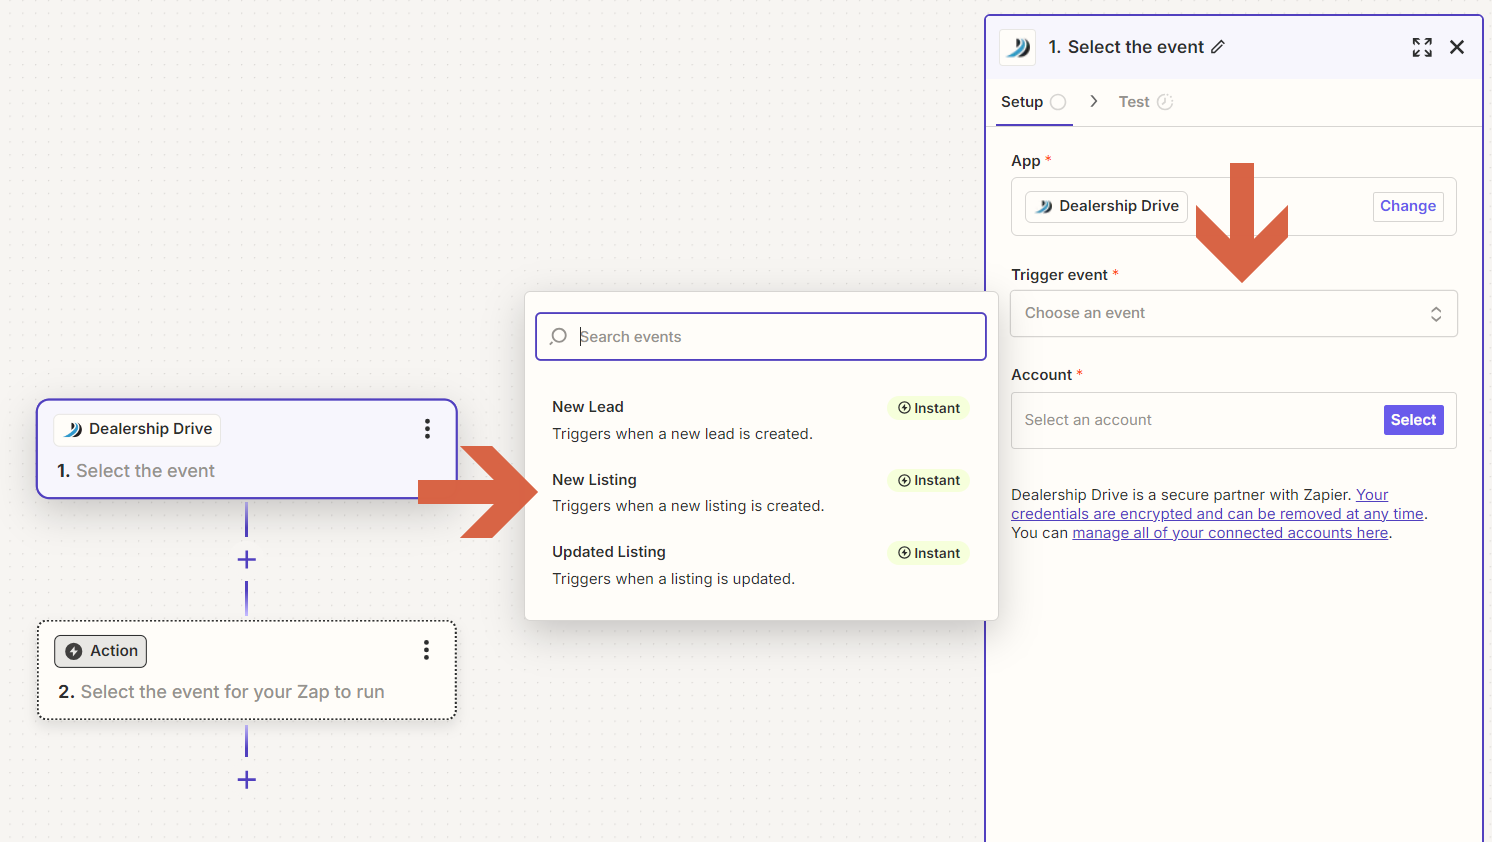
2. Select Trigger event
Click on "Choose an event" under Trigger event and select "New Listing". This is the event that occurs on Dealership Drive and that triggers the Zap.
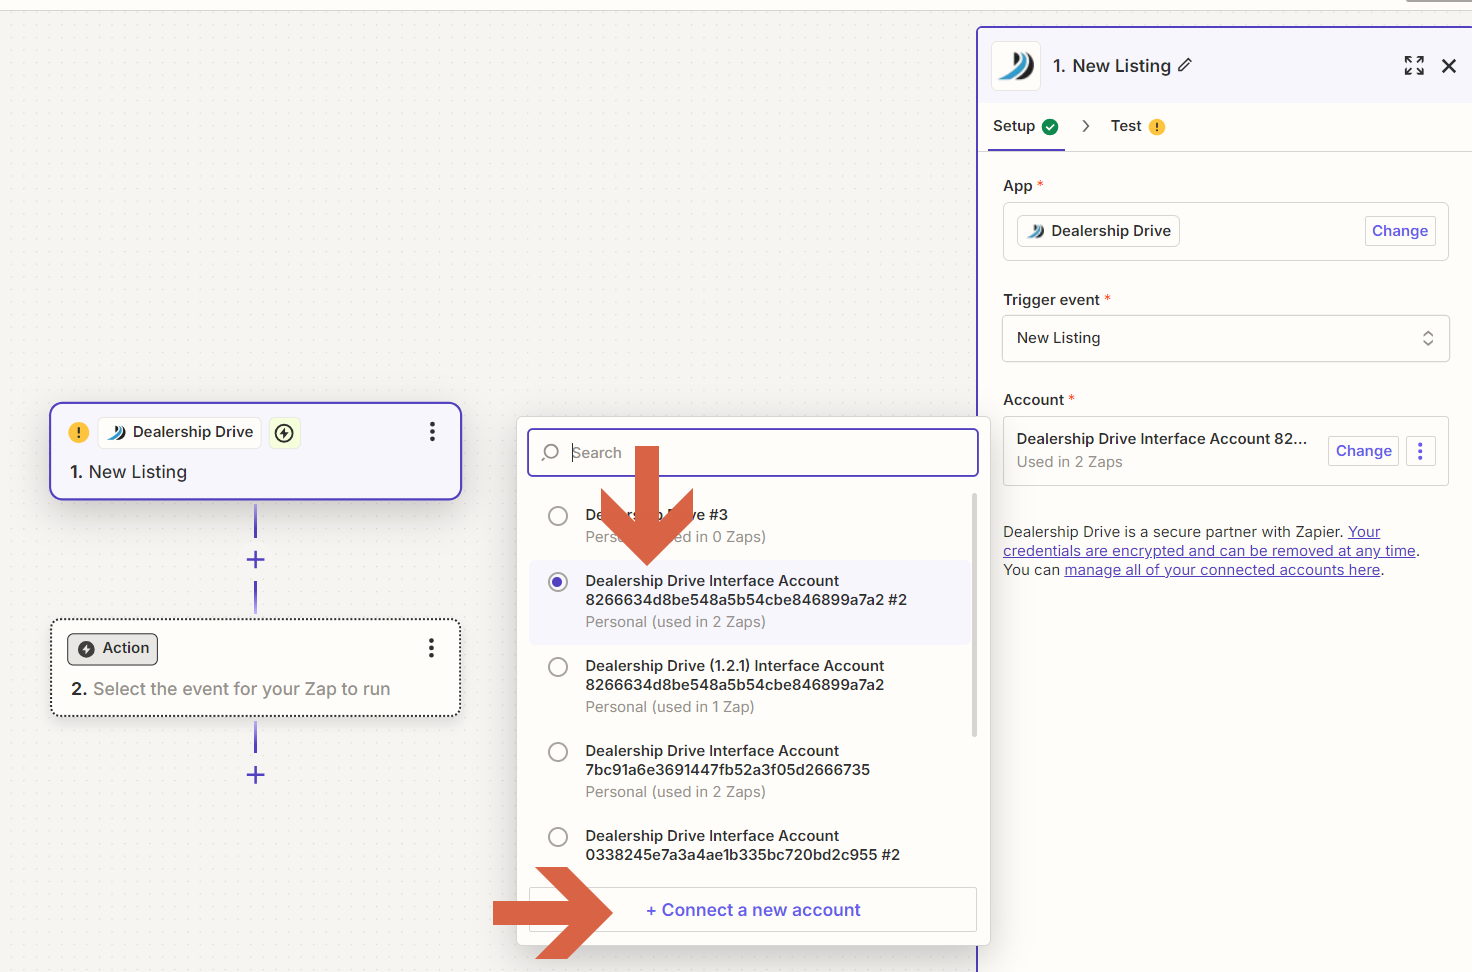
3. Select or connect your Dealership Drive account
If your Dealership Drive account is already connected to Zapier, select it from the list. If not, click "+ Connect a new account" to link it.
To connect your Dealership Drive account, go to your Company Settings under Account Management, and click the "Integrations" tab. Here, you'll see all the the apps and websites you can connect your Dealership Drive account to, including Zapier.
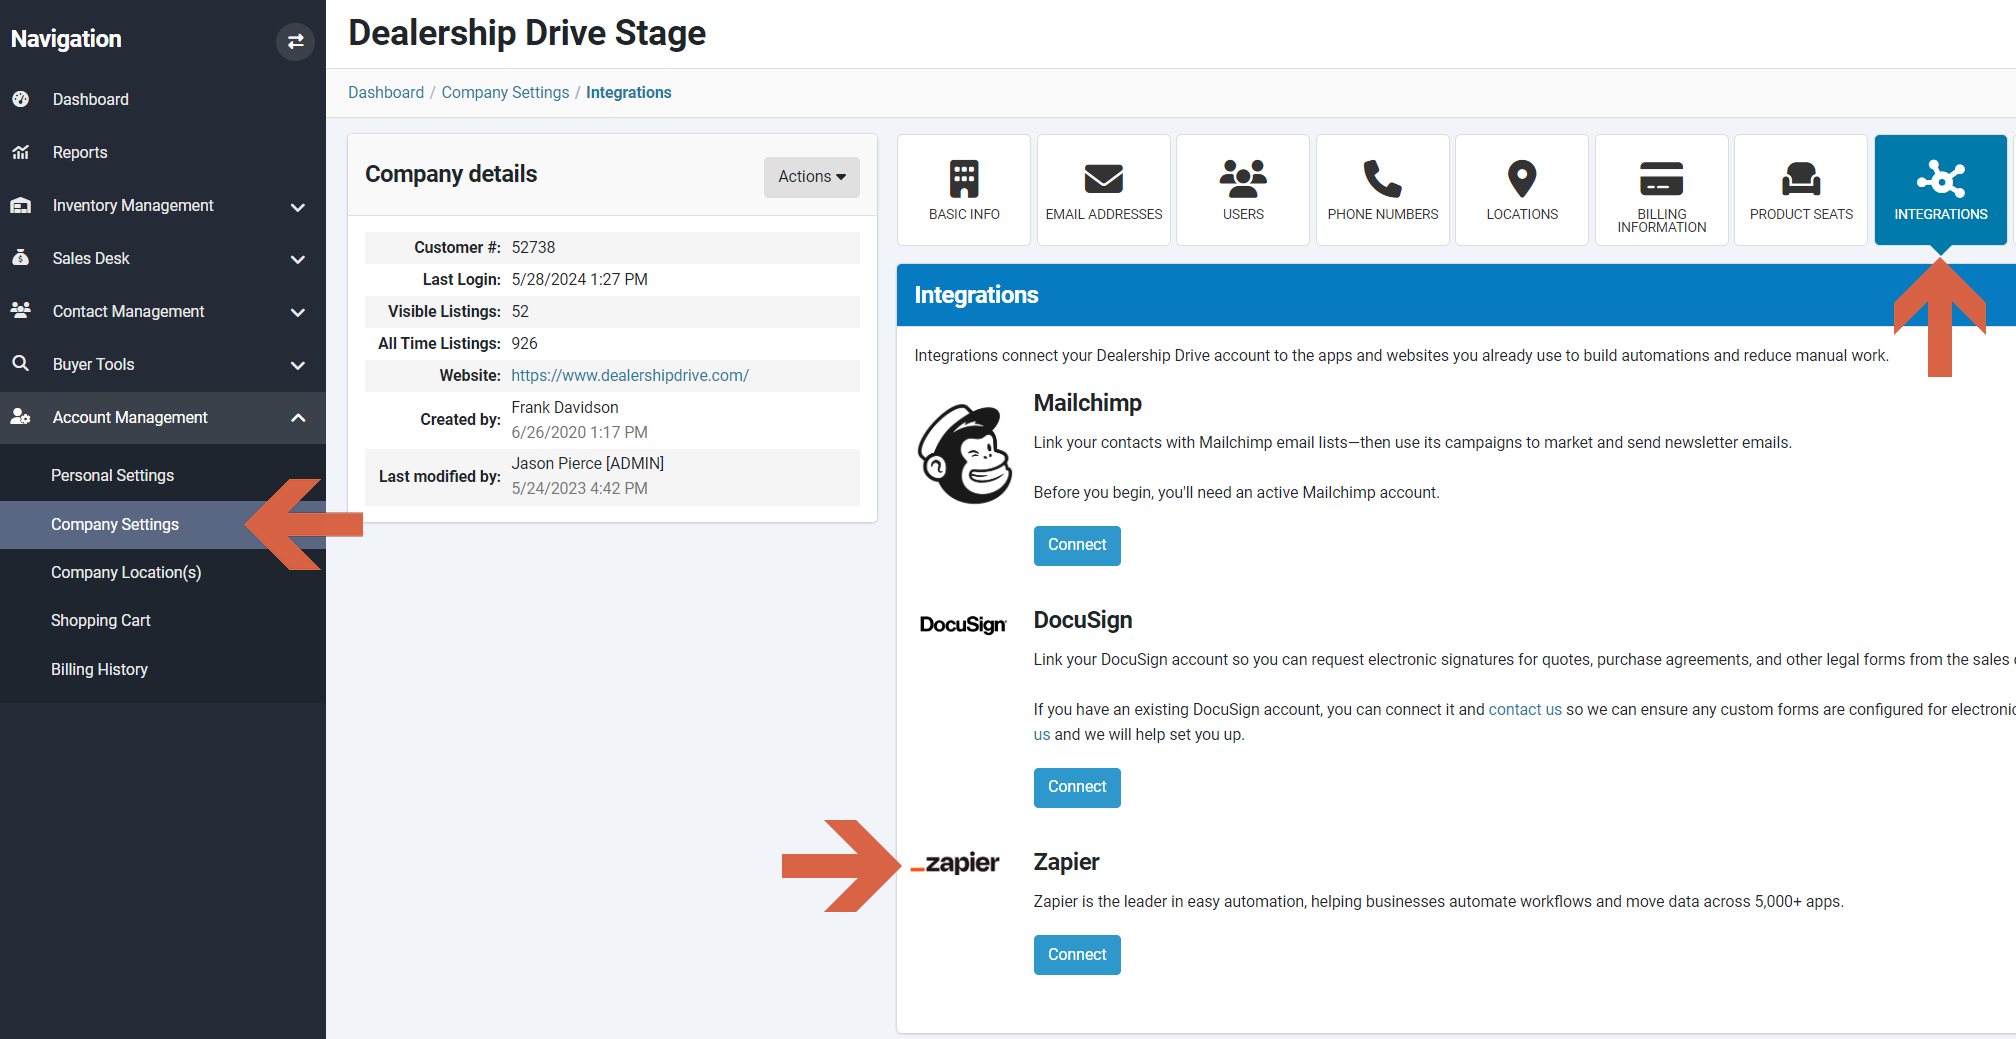
Click on "Connect" to obtain your Zapier Basic Authentication Credentials. These credentials are essential for connecting our Dealership Drive to your Zapier account.
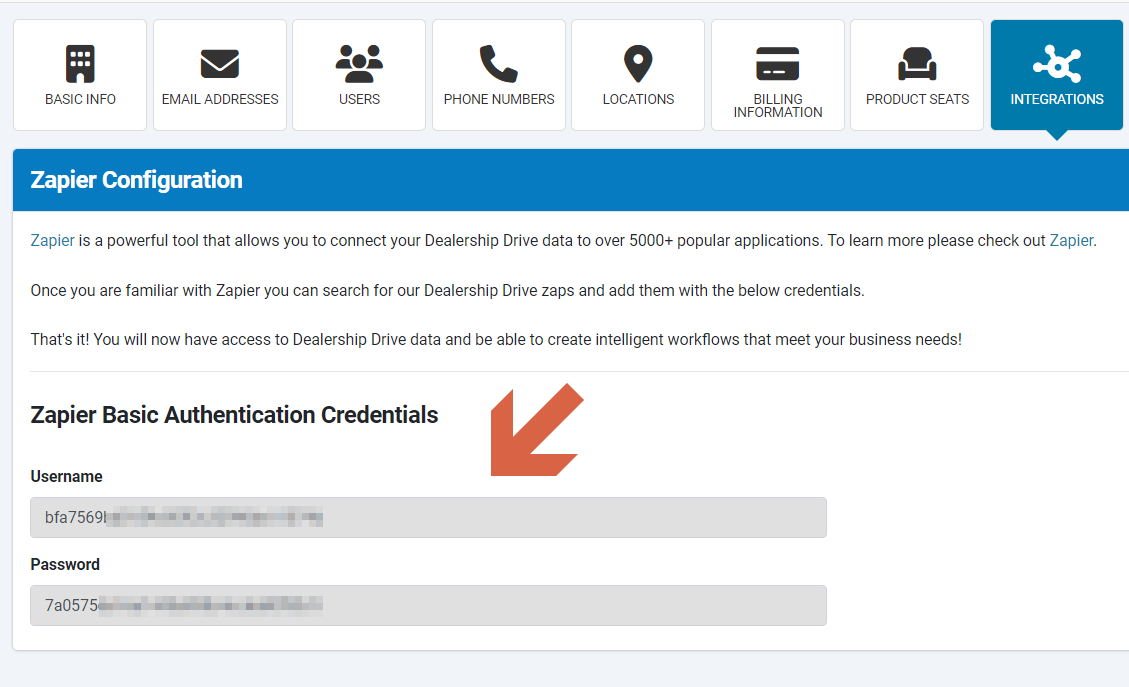
Copy and paste your Zapier Basic Authentication Credentials in the pop-up window that appears when you click "+ Connect a new account".
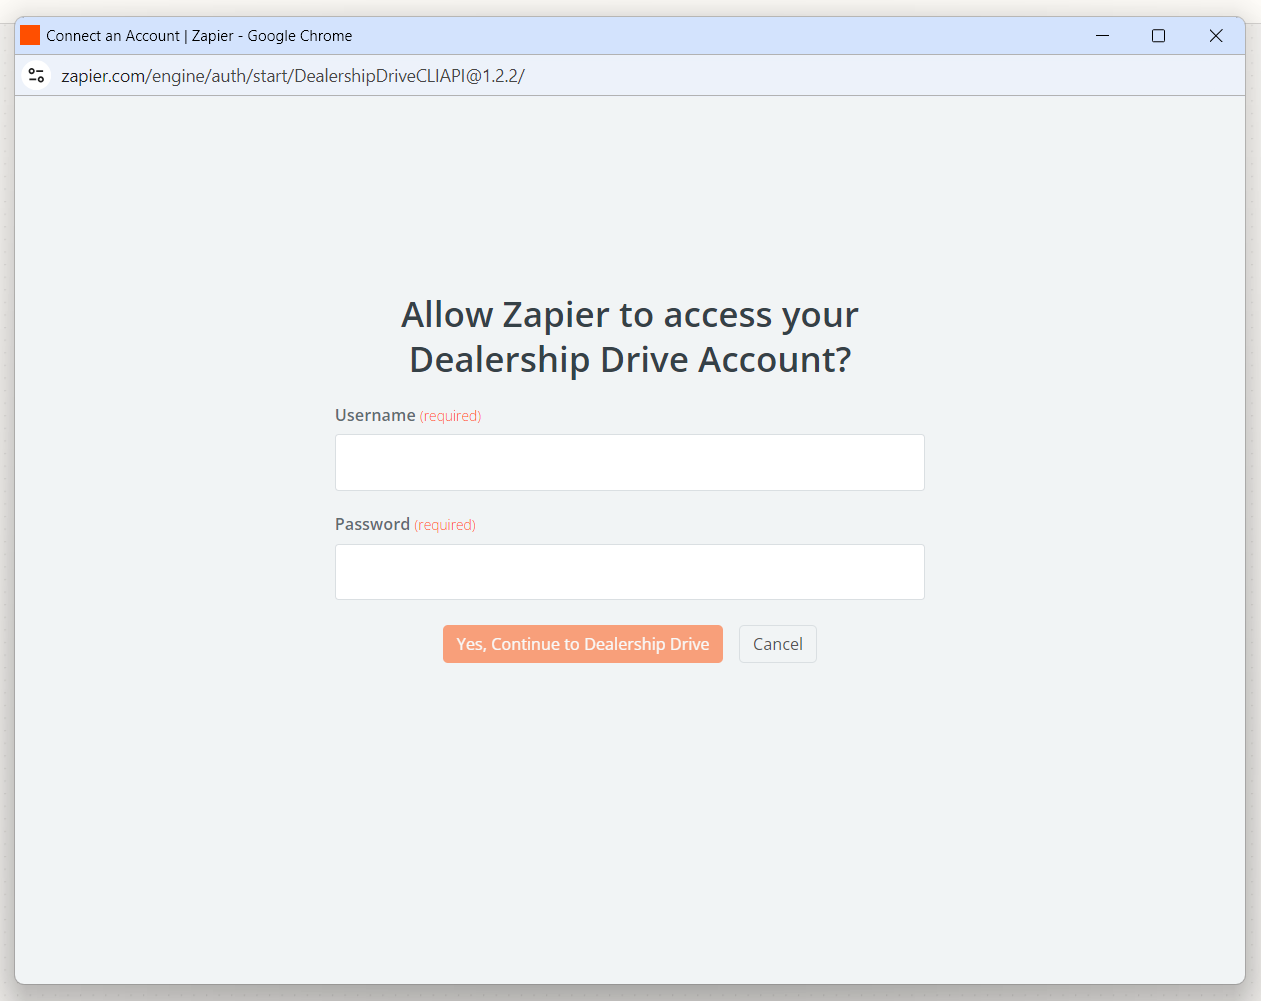
Your Zapier account is now connected to your Dealership Drive account.
4. Test your Trigger
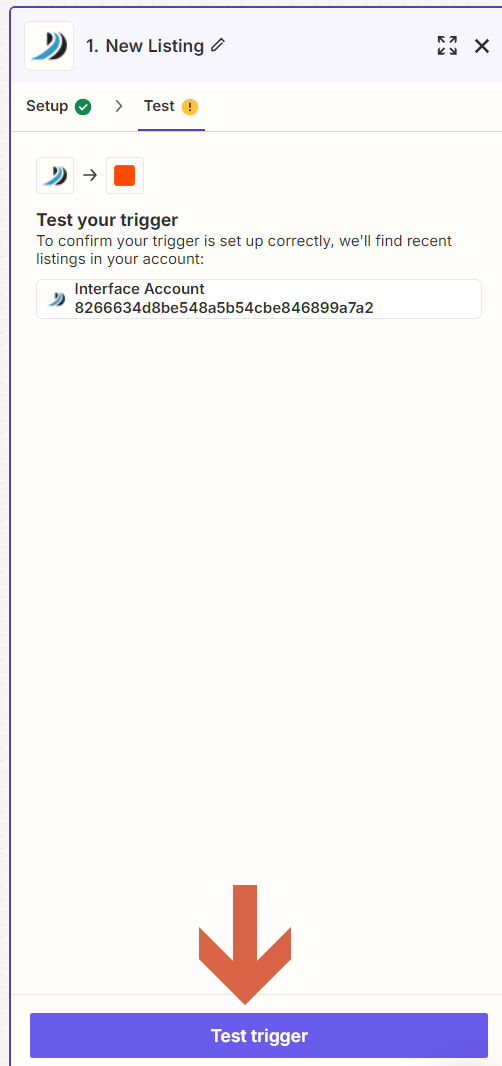
To confirm your trigger is set up correctly, click on "Test" or on "Continue".
By clicking on "Test trigger", Zapier will find new listings that were recently added in your Dealership Drive account.
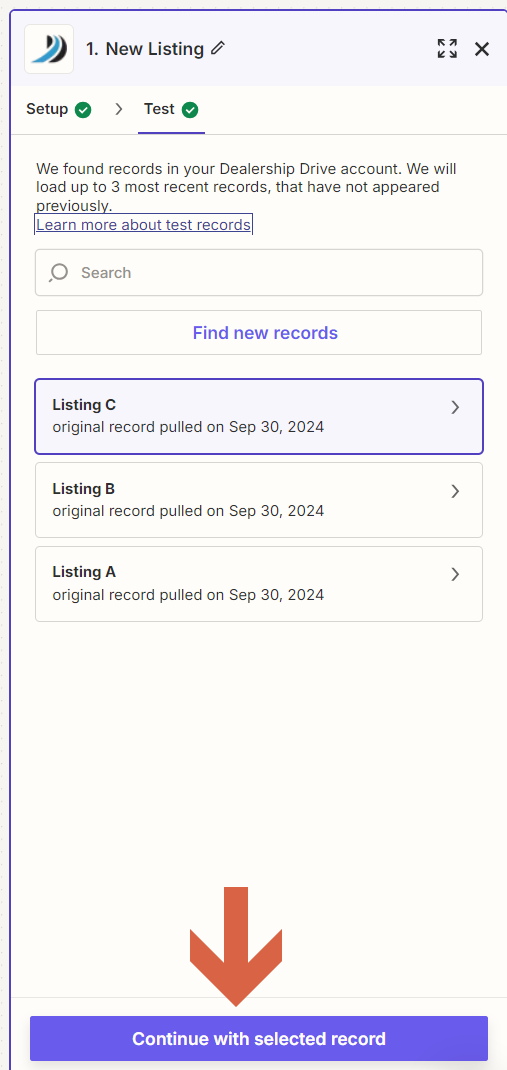
Zapier will load up to 3 most recent records, that have not appeared previously.
Select a record and click on "Continue with selected record". You will now move on to add an Action.
Add an Action
The trigger "When a new listing is added to my Dealership Drive inventory" is now set up. In order to add the action "Automatically add the new listing to my Facebook page", you need to set up Facebook as you action app.
1. Select action app
In the pop-up window, that appears after you clicked on "Continue with selected record" in the previous step, select "Facebook Pages" as your action app.
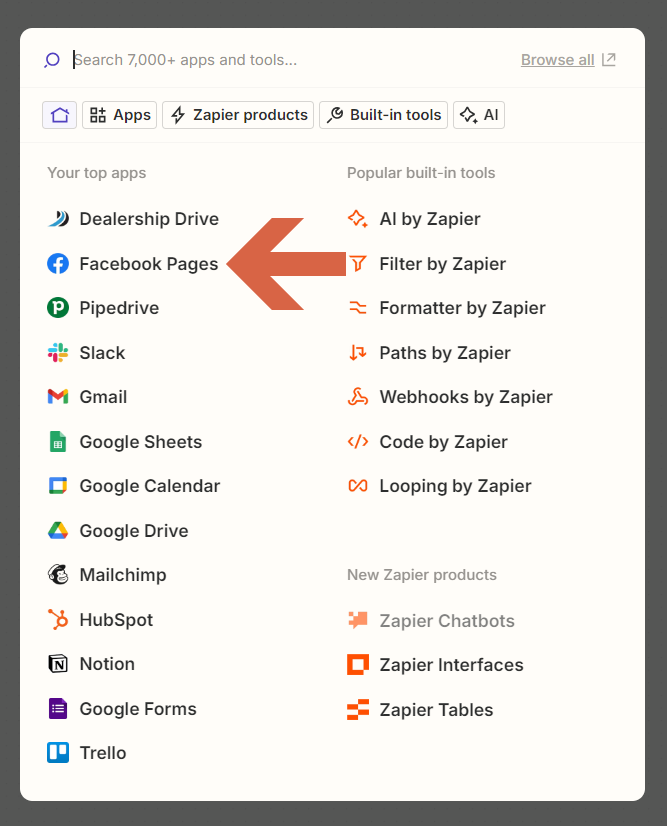
Your Facebook account is now set up as your action app.
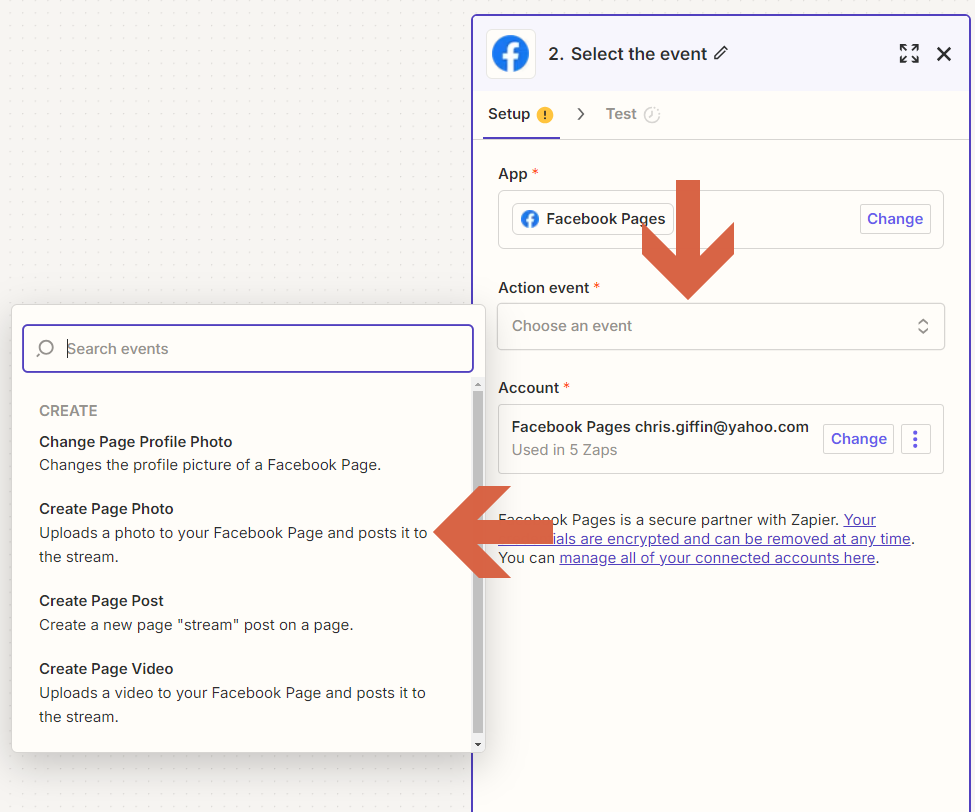
2. Select action event
To select an action event, click on "Choose an event" and select "Create Page Photo". Click on Continue.
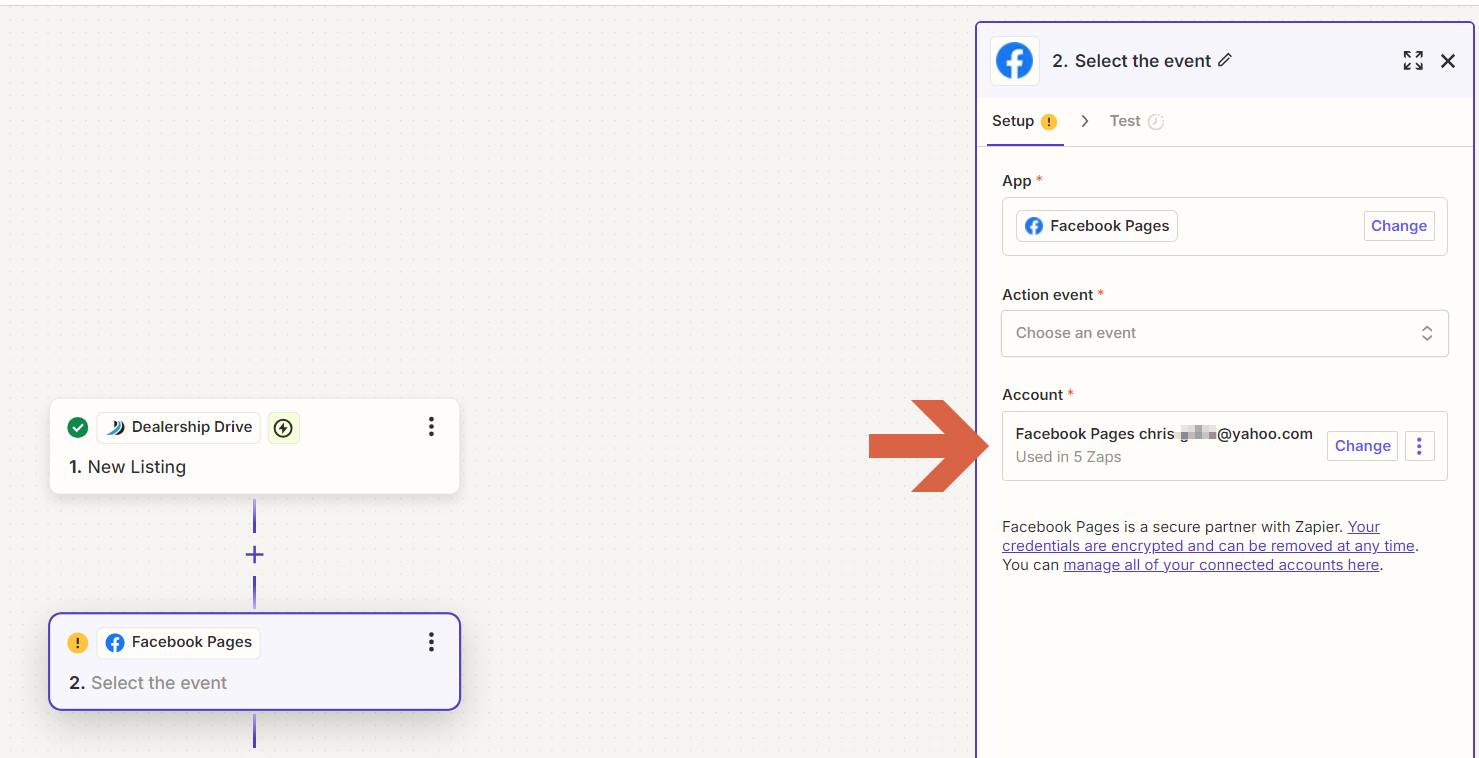
3. Select app account
Select your Facebook page as your app account.
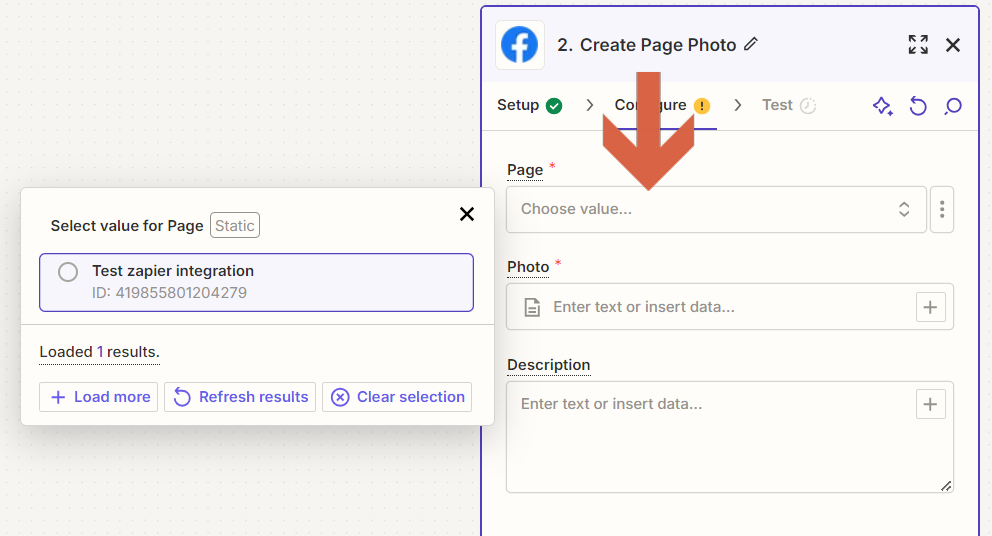
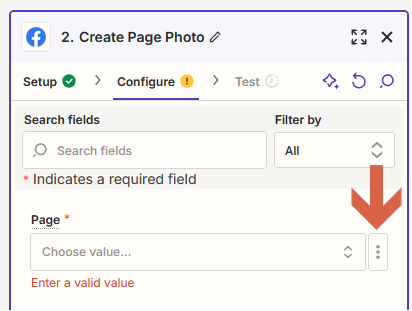
If you have issues selecting your Facebook page, please follow the following steps:
1. Click the 3 little dots to the right of the “Page” field:
2. Select “Custom”, which will open a window.
3. When the window opens up, simply click the “X” in the top right to close it.
4. Follow the instructions at this link to find your “Page ID”: https://www.facebook.com/help/1503421039731588
5. Paste the Page ID into the "Page" field. If it doesn’t let you paste, keep the Page ID copied to your clipboard, click the 3 dots again, select “Custom,” and close the window that opens. You should then be able to paste the Page ID into the Page field.
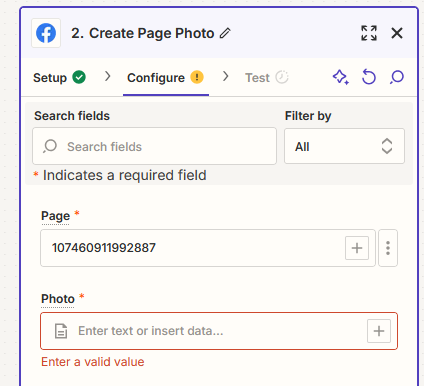
6. Proceed to the Photo and Description fields to start selecting fields and click the “Continue” button at the bottom. to test this.
If the test fails, feel free to reach out to our Technical Support Team. at tech@mlsinc.com.
4. Set up your action
Define the data you want to send from Dealership Drive to your Facebook page.
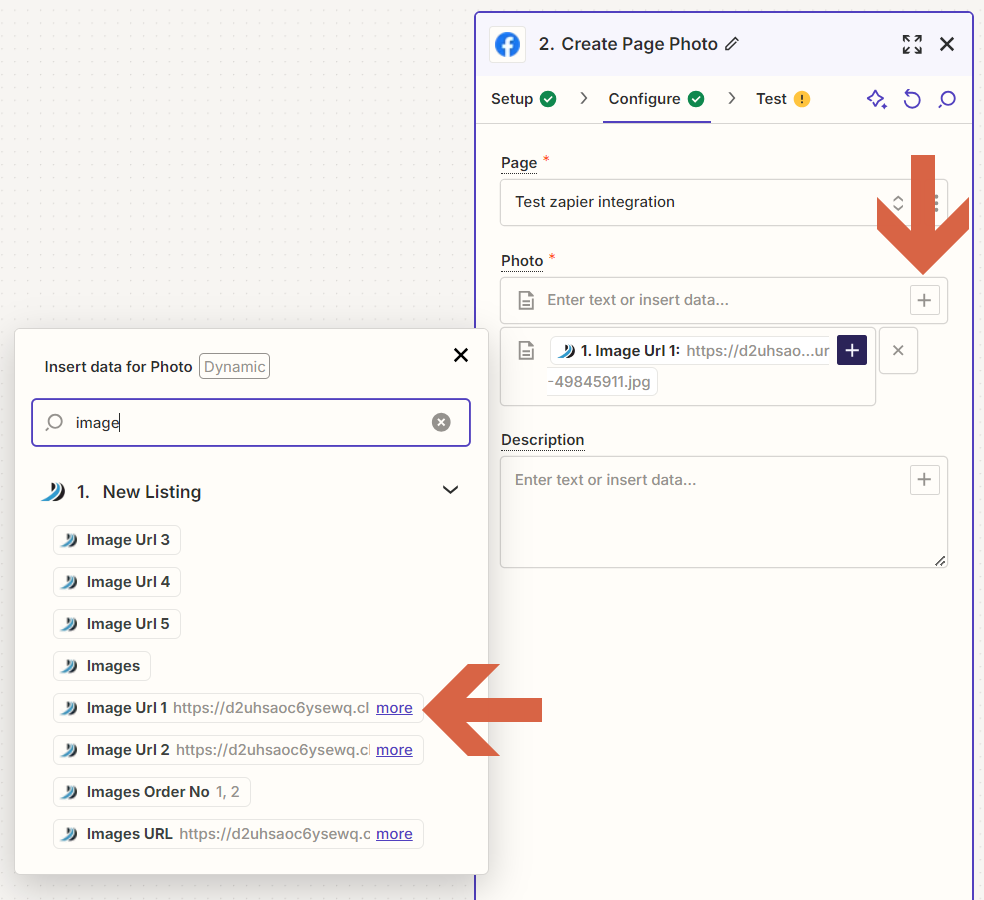
Photo
Click the plus sign (+) to choose at least one image you want to display in your Facebook post. Make sure the image shows a value/URL after "Image Url1".
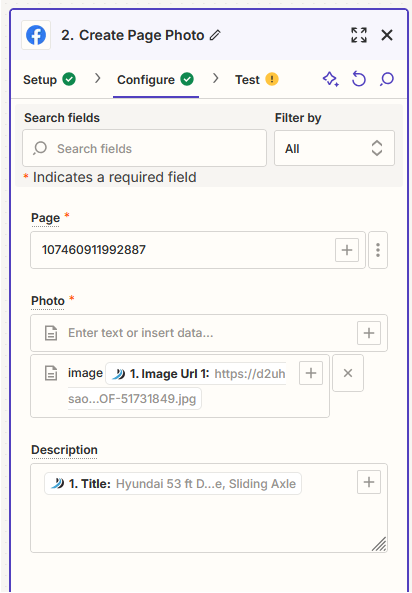
Description (optional)
To add a description, either type text into the Description field or click the plus sign (+) to select additional data for your Facebook post. Make sure the selected data displays a value, and select the data in the order you want them to appear using spaces and punctuation as needed for clarity.
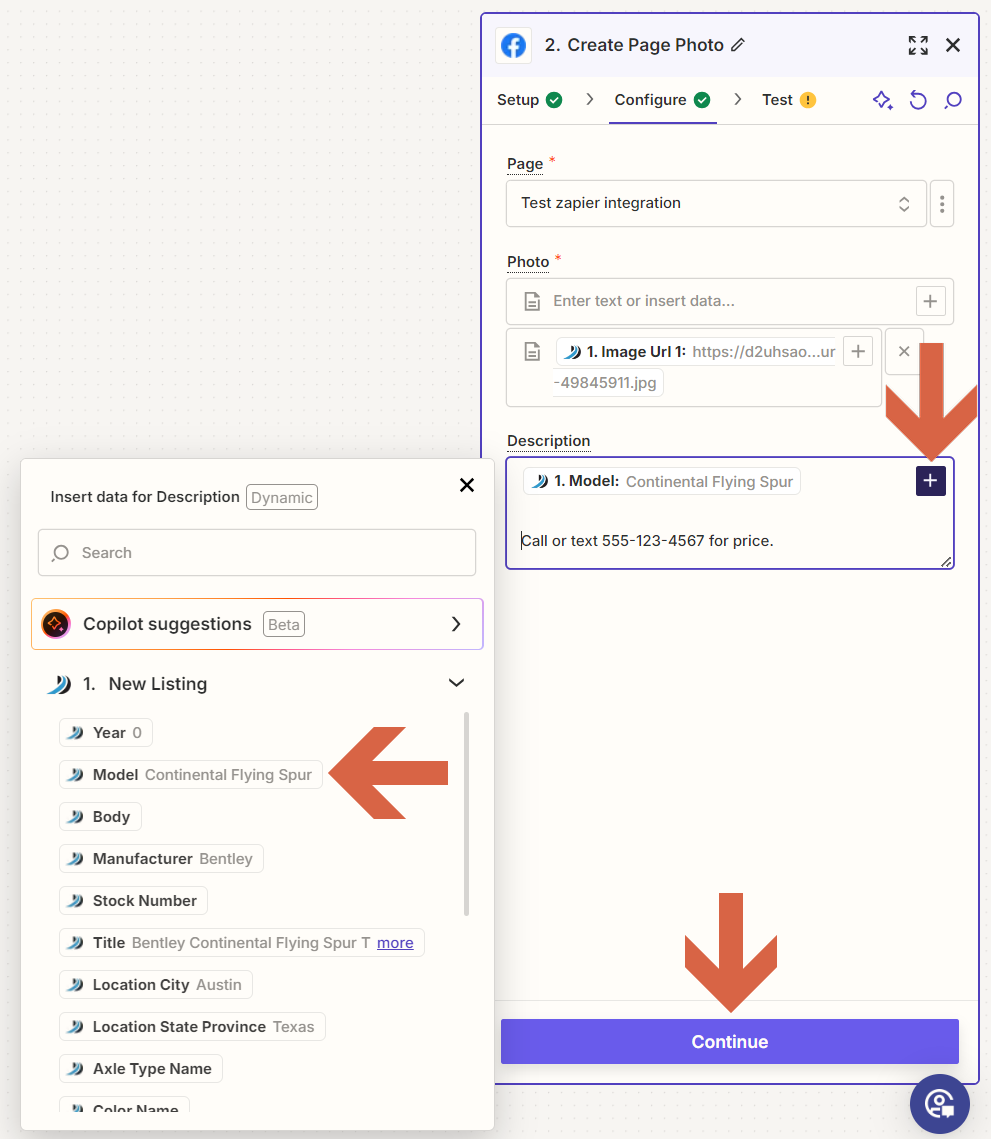
Click "Continue".
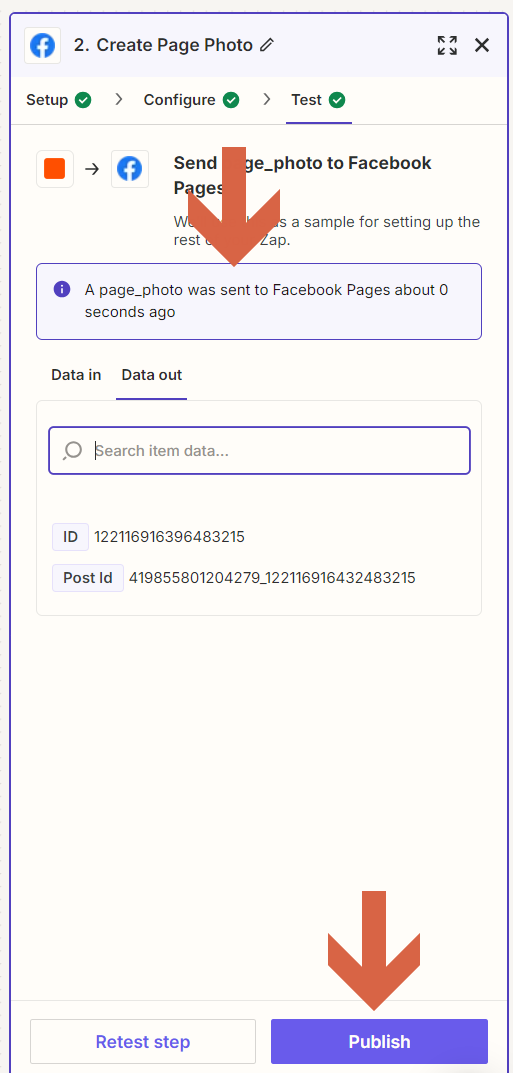
5.Test your action (optional)
Once your action is all set up, you have the option to test your action to see if it is working as expected. This step is not required, but recommended.
To test your action, click on "Test step".

Check your Facebook page to see the post. This is the way all your Zaps with this trigger and action will appear.

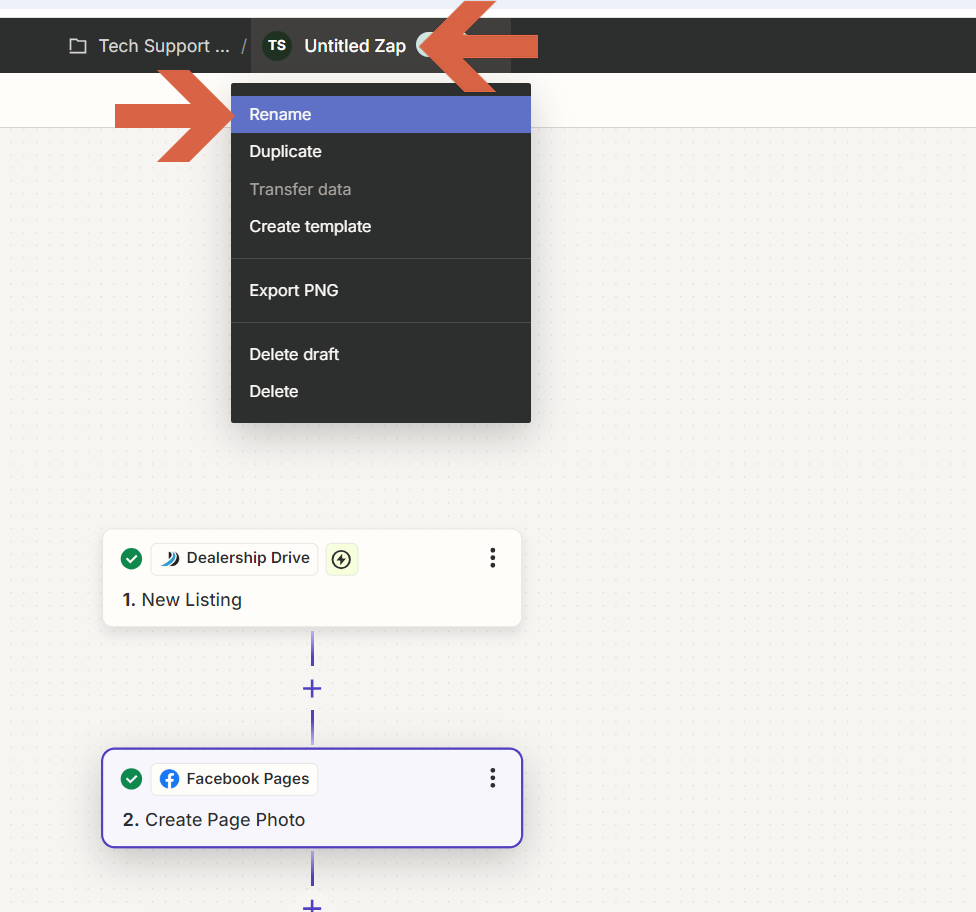
Name your Zap
Give your Zap a name so you can easily identify it on your dashboard. In the center of the top menu bar, click "Untitled Zap". A dropdown menu will open, select "Rename", and enter a name for your Zap. Click anywhere outside the Zap name to save the new name.
Publish your Zap
After you set up and name your Zap, click "Publish" to publish the Zap.
Once your Zap is published, Zapier will run your action steps each time your trigger event occurs. You can view a log of all your Zap activity, including all the data that goes in and out of each of your Zap steps, in your Zap History.
Please note: There is a 1-hour delay between when your listing was added and/or updated on Dealership Drive and when the listing is sent to Zapier and posted on Facebook. This delay helps prevent the same listing from being sent to Zapier if the new listing is updated or edited after being added to Dealership Drive.
Related article: How to Automatically Post Updated Listings to Your Facebook Page
Questions and Suggestions?
Contact your Dealership Drive sales representative.