
How to Create, Edit and Assign Roles and Permissions
The Roles & Permissions settings allows you to provide everyone in your company with the appropriate level of control over your system.
Assigning specific roles and permissions ensures that employees can quickly access the tools and information they need for their jobs without navigating unnecessary or irrelevant areas of the system, prevents accidental or uninformed changes that could potentially disrupt operations, and helps in maintaining order and ensuring that processes are followed correctly.
Roles and permissions
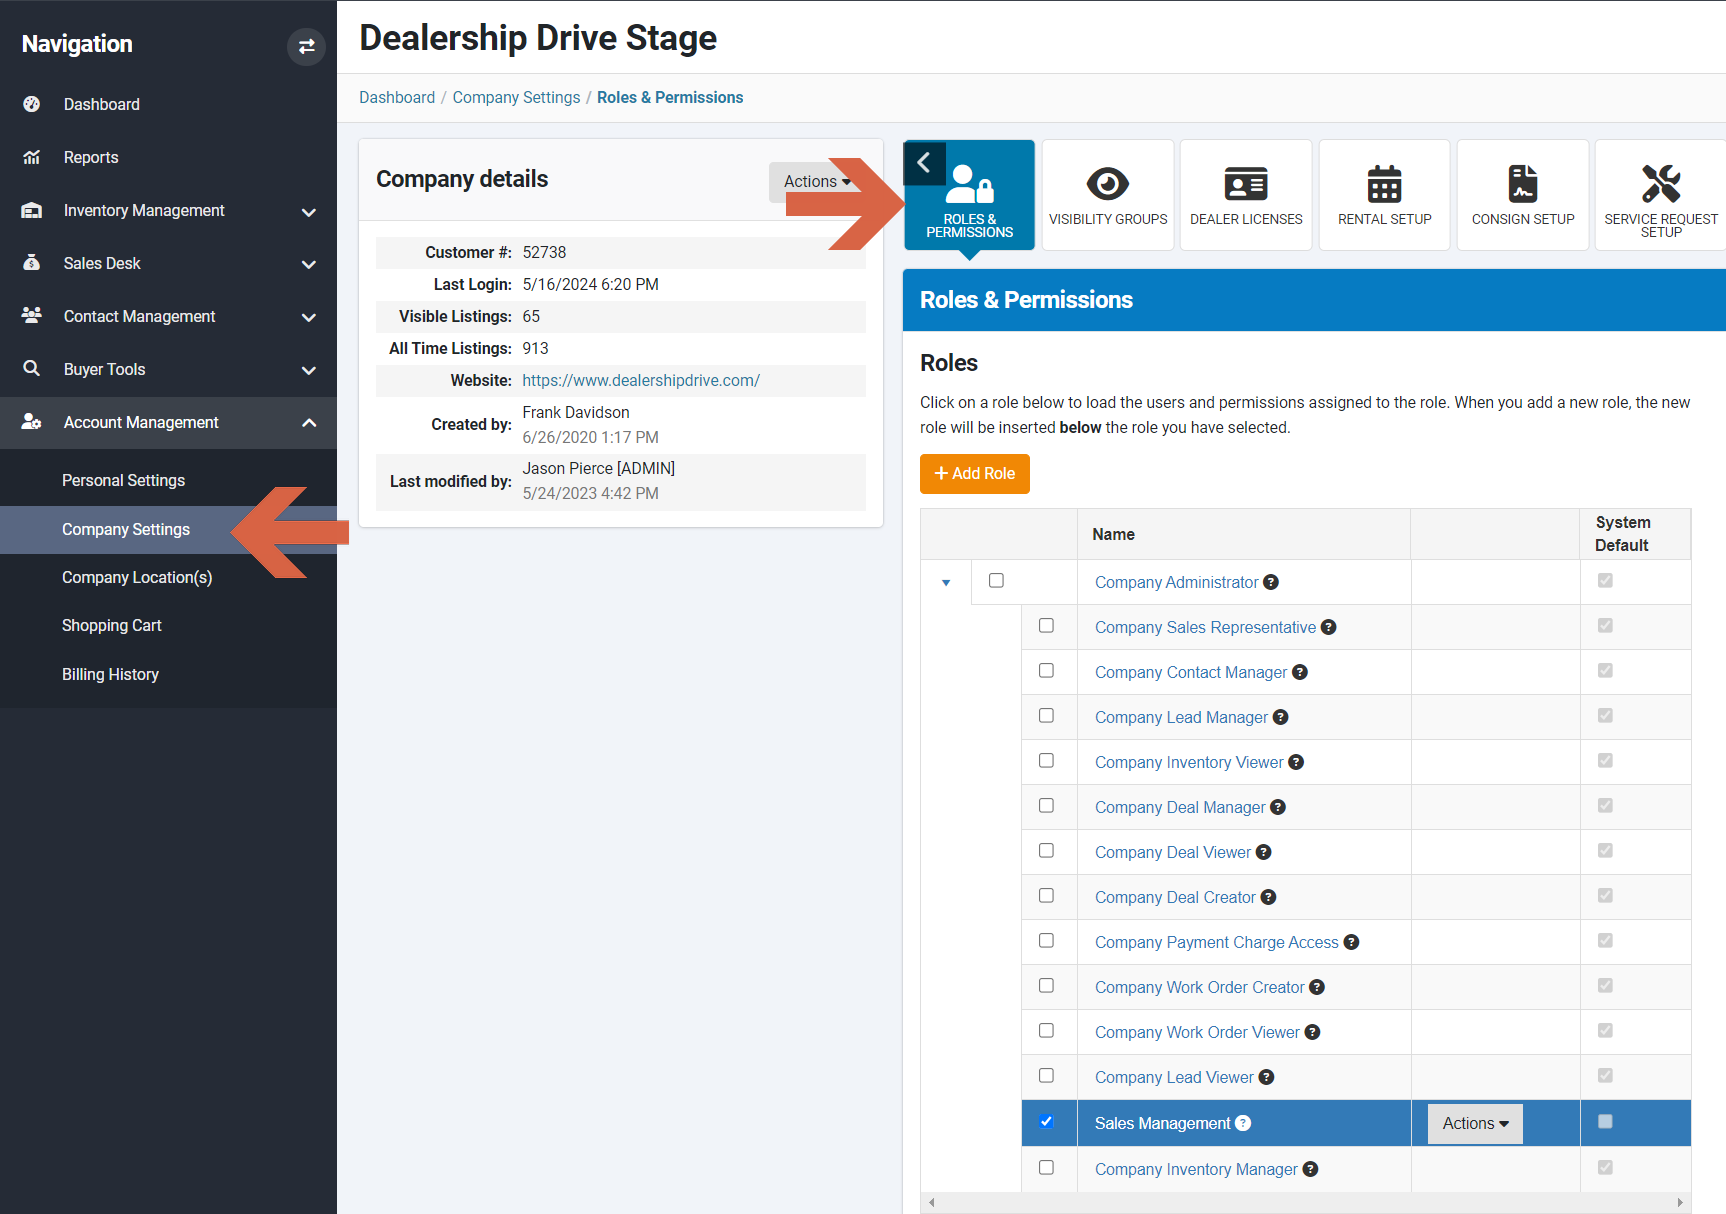
In the Company Settings under Account Management, click the "Roles & Permissions" tab. Here, you'll see all the roles and permissions configured for your company, including both system default roles and those custom-designed by and for your company.
Default roles
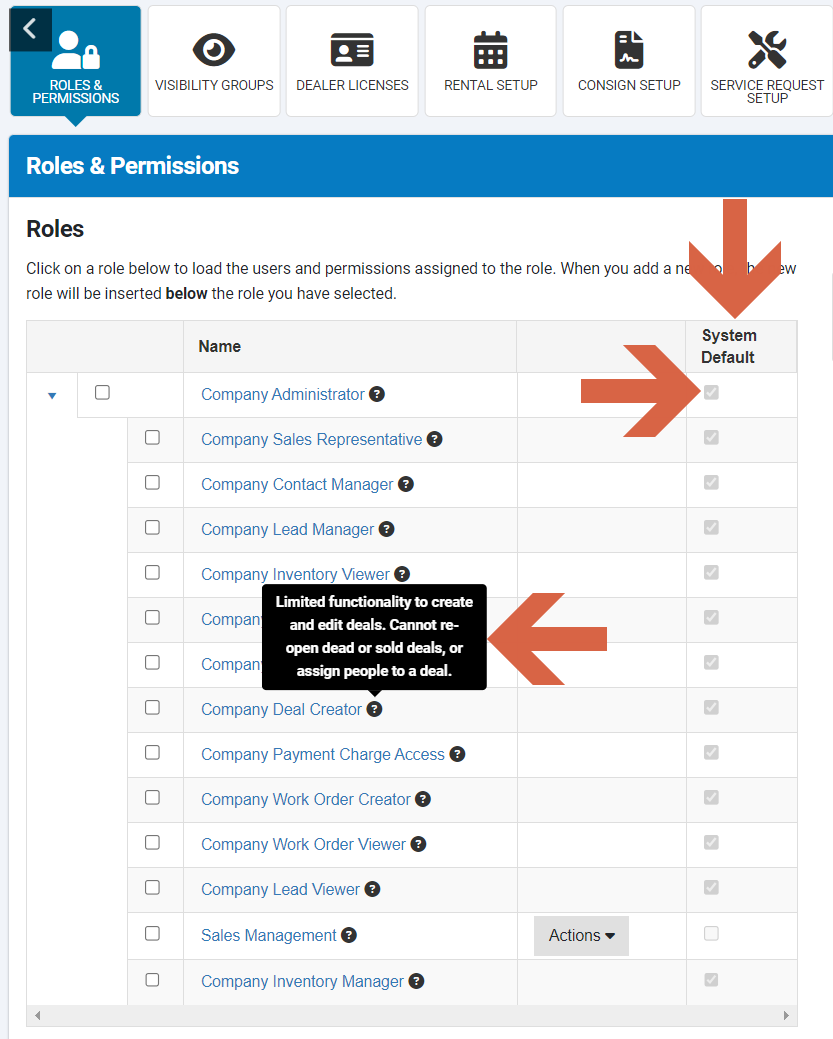
Default roles, indicated by the "System Default" column, cannot be modified, renamed, or deleted. Place your cursor over the ?-symbol to view details and explanations for each default role. Should these roles not align with your needs, you have the option to create a custom role.
Custom roles
Custom roles are custom-defined roles by and for your company. They can be modified, renamed, or deleted. Place your cursor over the ?-symbol to view details and explanations for this custom role.
Permissions
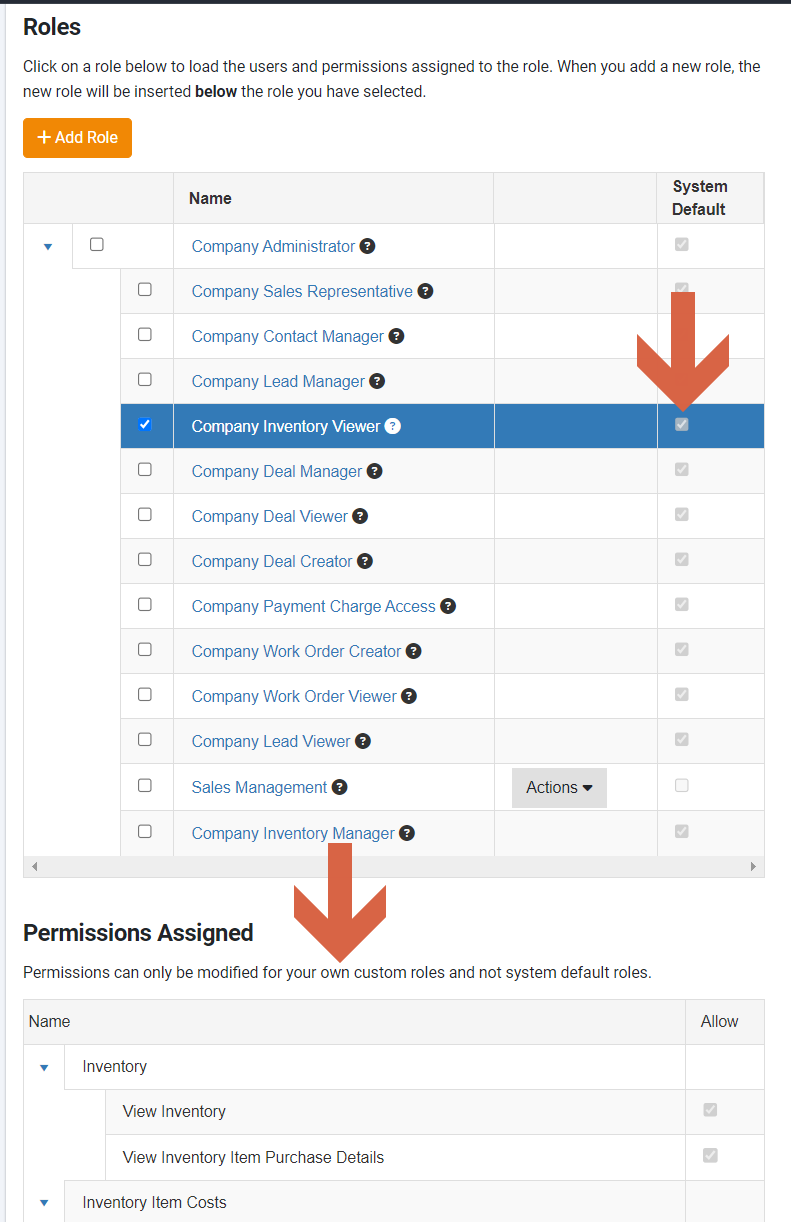
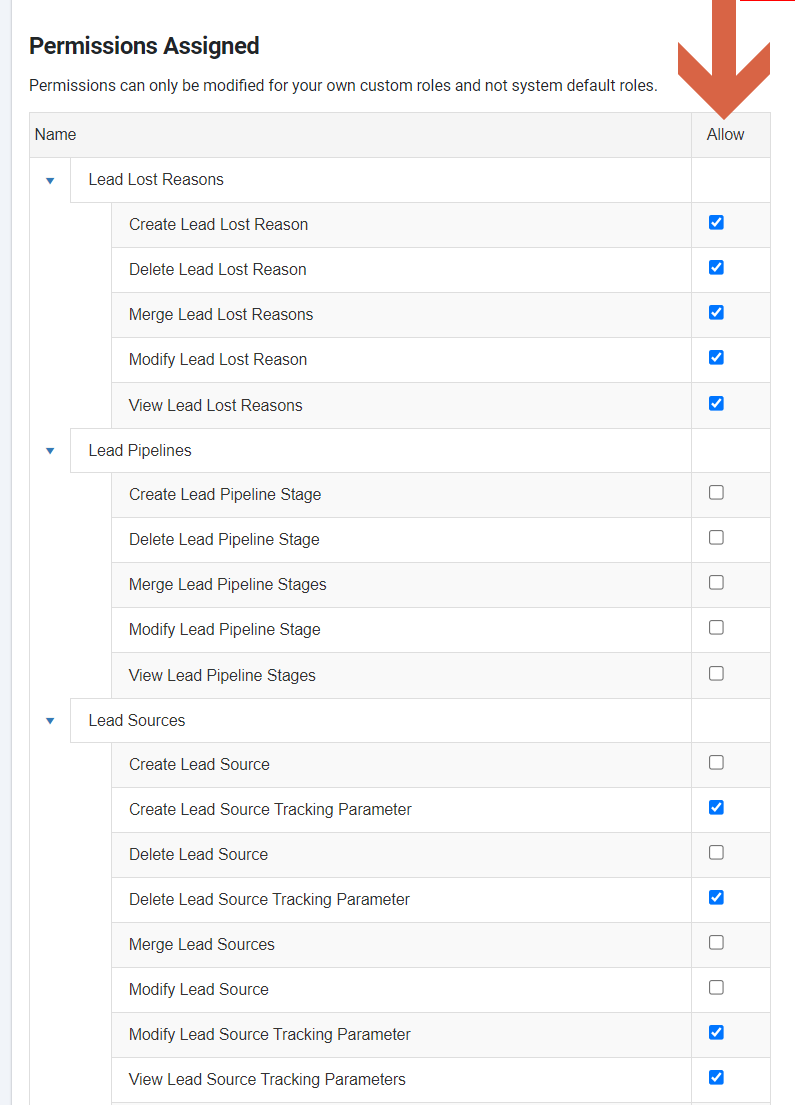
Each role, whether it is a default or a custom role, comes with defined permissions that outline the limits of user access. To view the permissions assigned to each role, select on the desired role and scroll down to the "Permissions Assigned" section.
Create or edit a role
Only custom roles can be modified, renamed, or deleted; default roles are pre-defined by the system.
Create a role
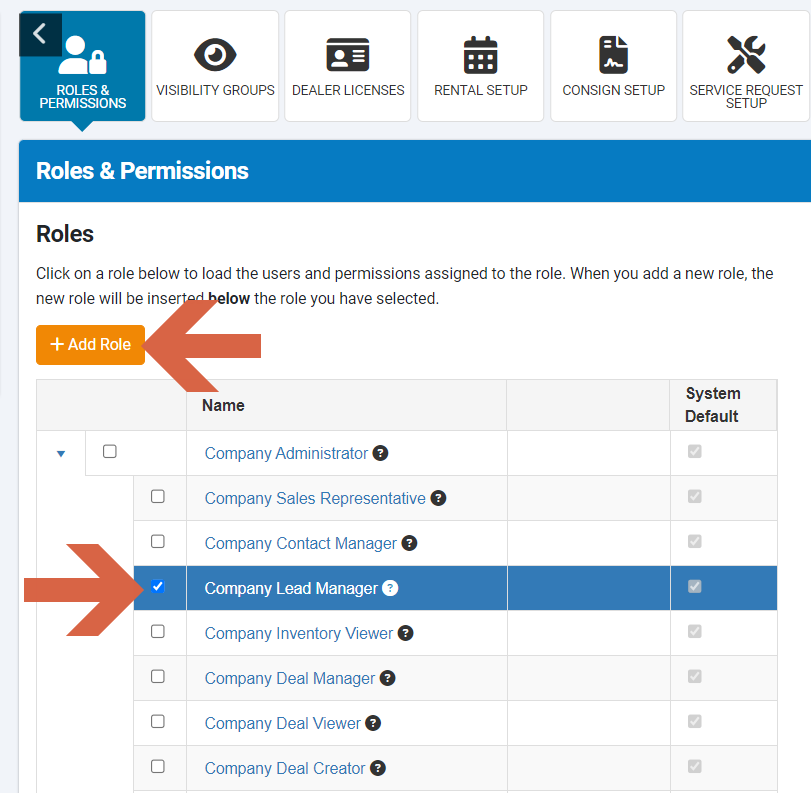
To create a custom role, select an existing role that has a similar level of permissions to what you want for your custom role ("parent role") and click the "+ Add Role" button.
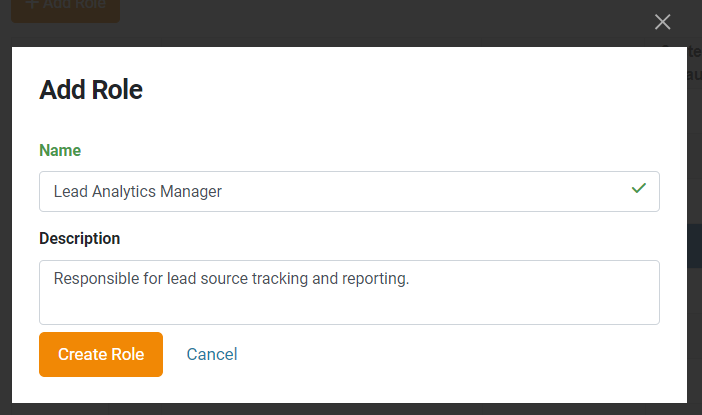
Enter a role name and description, and select "Create Role."
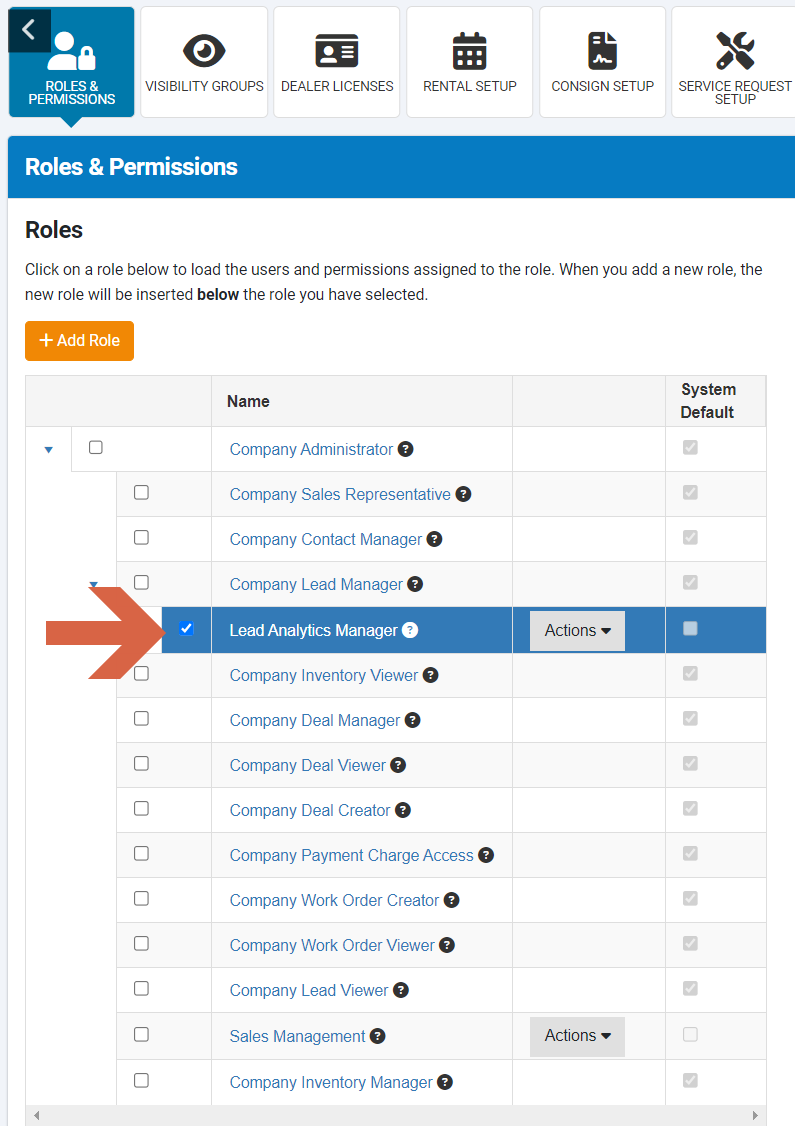
Once created, the new role will be visible under the selected parent role.
Select or remove permissions for a role
To define the permissions for a new role, select the new role and scroll down to the "Permissions Assigned" section. Mark the checkboxes next to the permissions you want to add. To remove permissions, deselect the respective checkboxes.
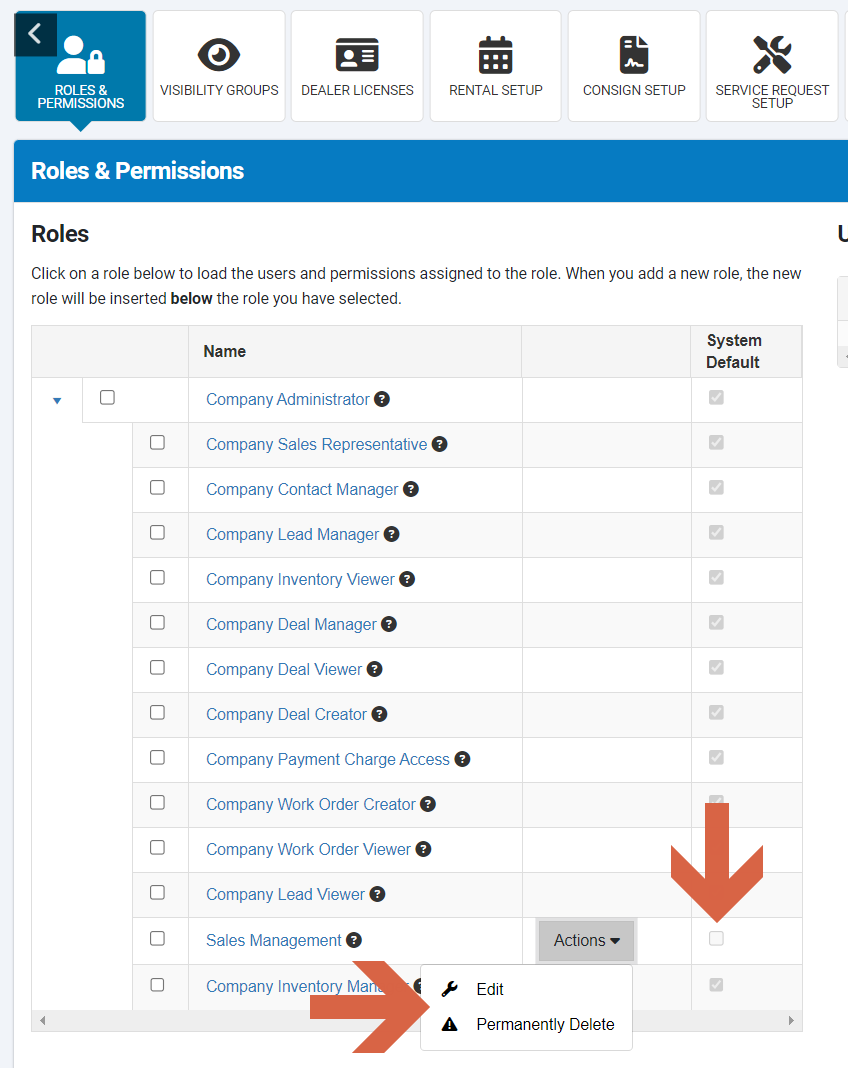
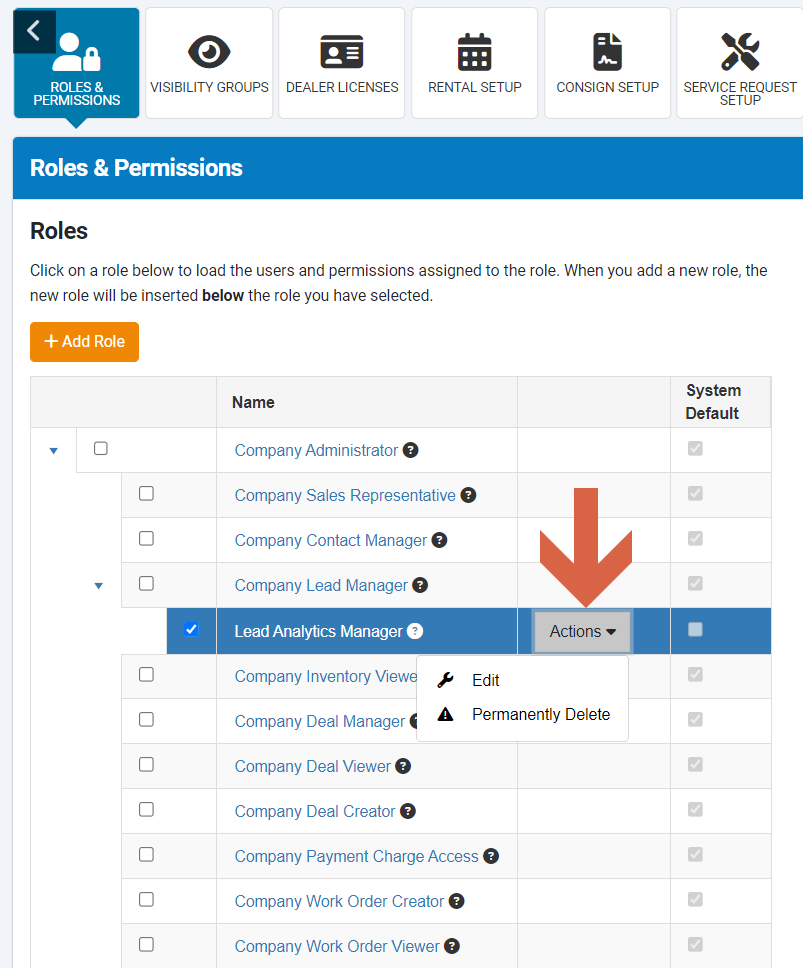
Edit or delete a role
To edit or delete a role, select the role, click on the "Actions" drop down and either select "Edit" or "Permanently Delete".
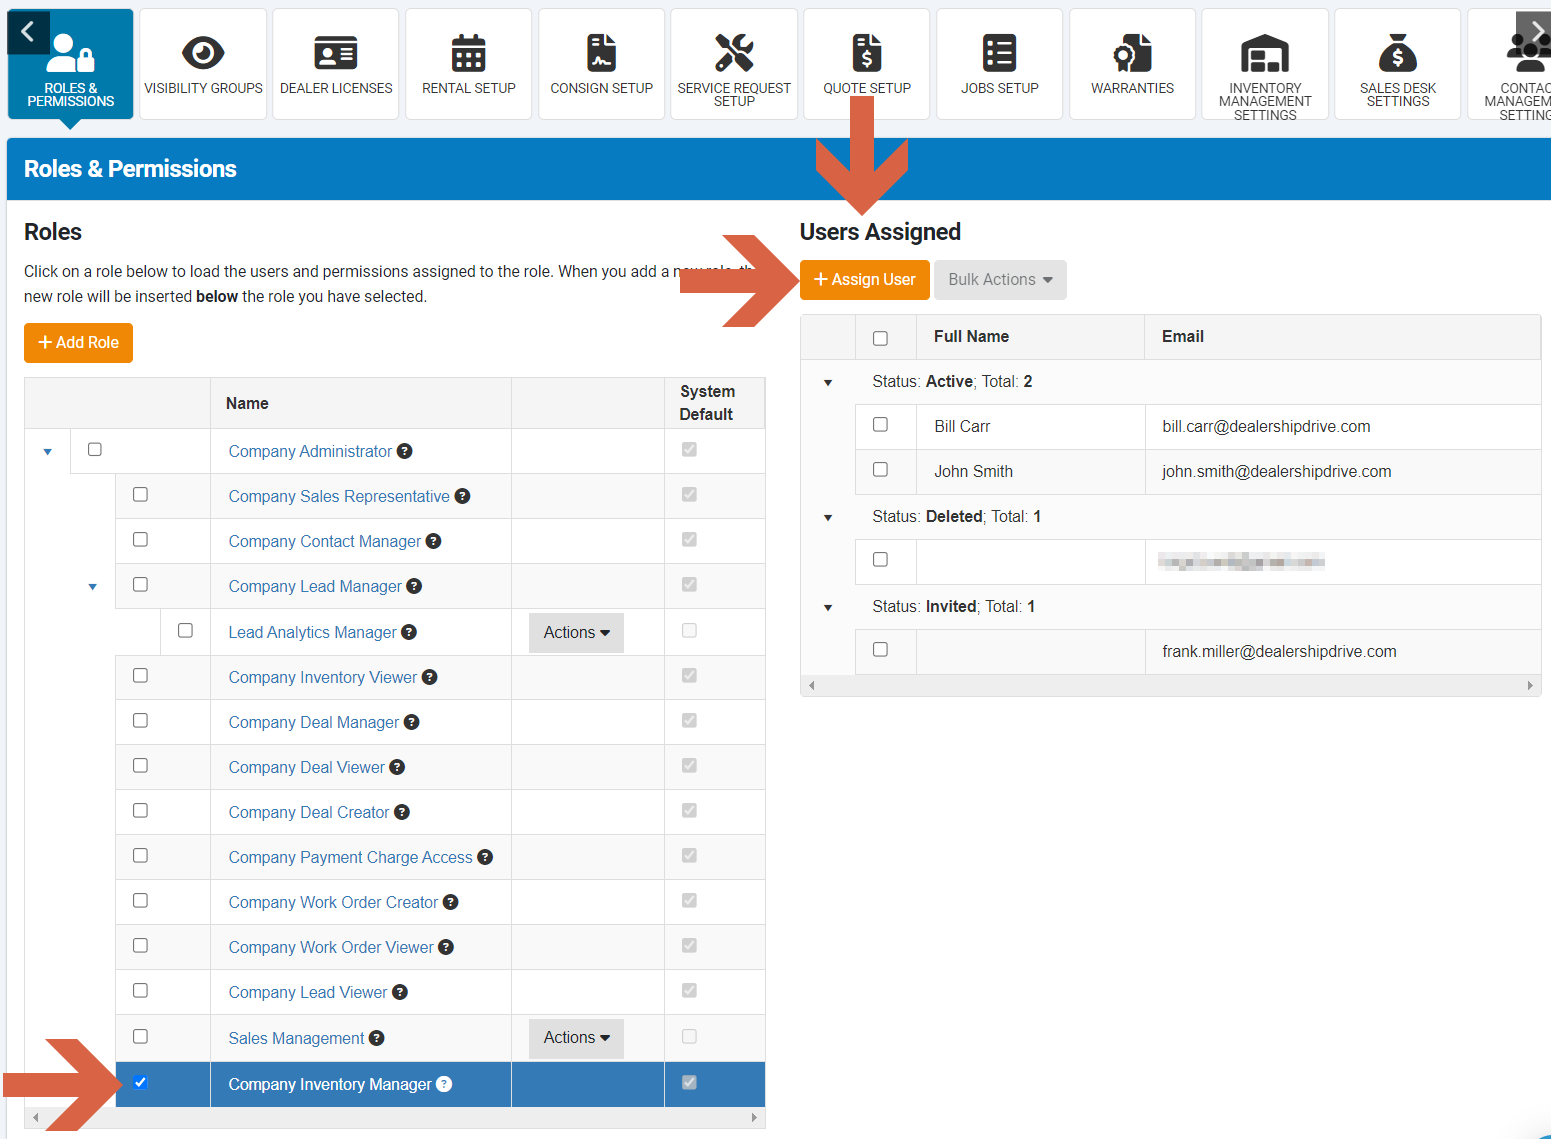
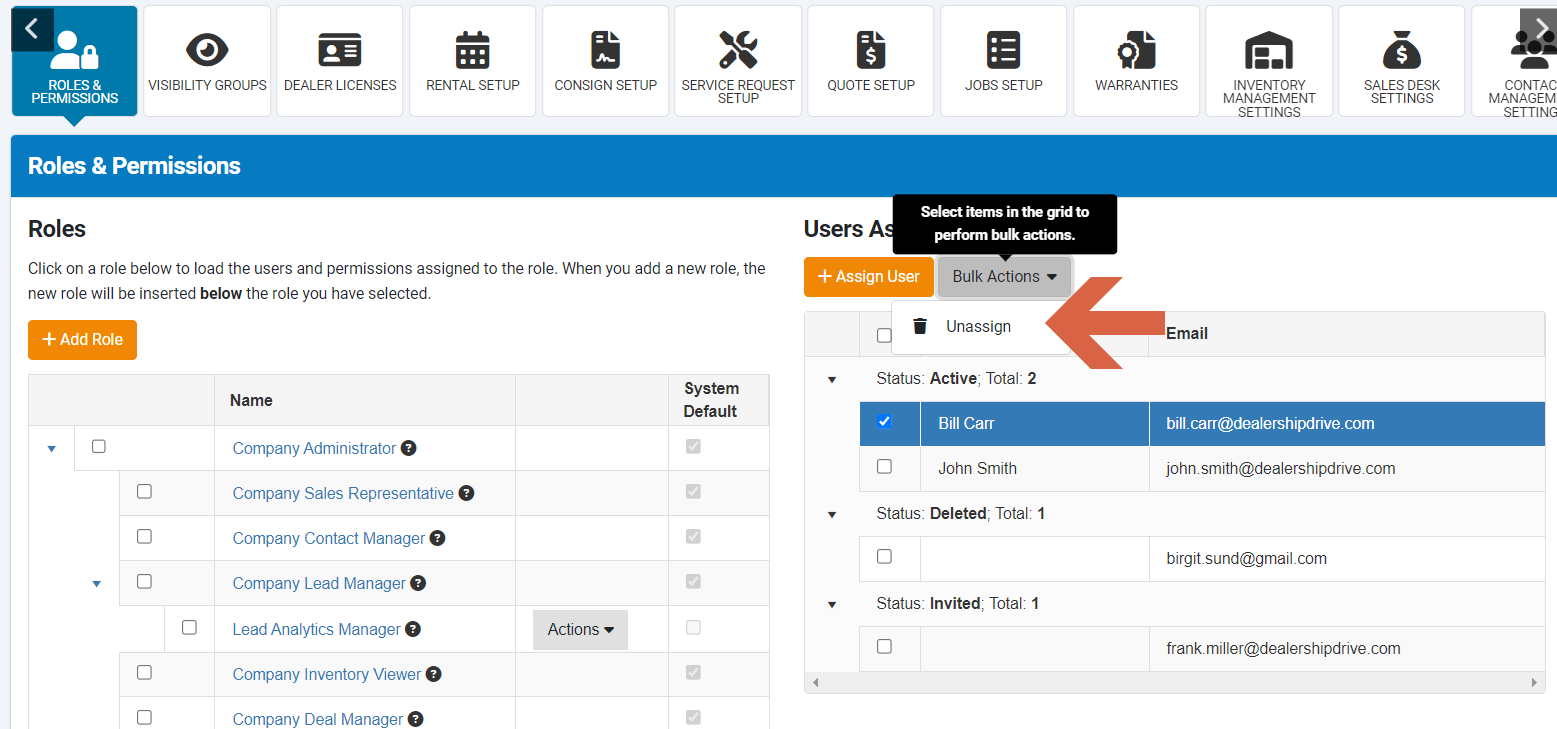
View, assign and unassign users from a role
To view all users associated with a specific role, select that role. In the "Users Assigned" section, you'll find a list of all active, deleted, and invited users assigned to this role.
To assign new users to a role click on the "+Assign User" button.
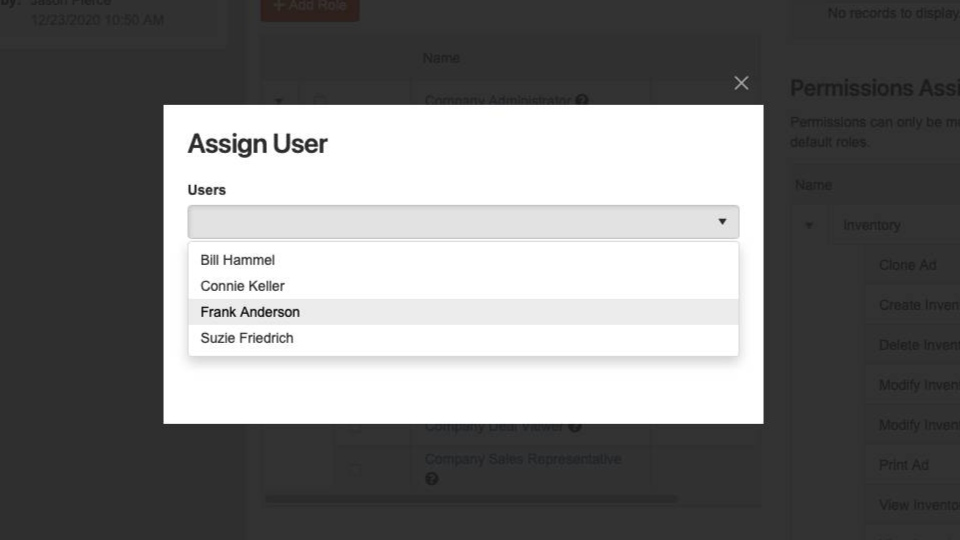
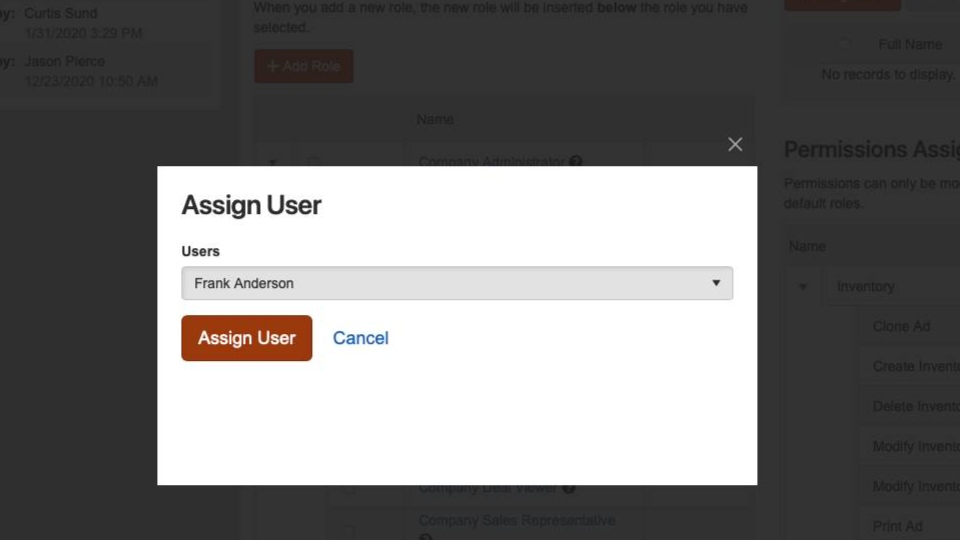
In the pop-up window, select the user from the drop-down menu and click on "Assign User".
To unassign users from a role, select the user(s) and select "Unassign" from the "Bulk Actions" drop-down menu.
Questions and Suggestions?
Contact your Dealership Drive sales representative.